English translation of the Norwegian library. Product names and original documents retain their source language. Model-specific maintenance steps have been reviewed; other text uses assisted translation. Check the original manual before work.

← Product search · Original images, demonstrations and manual
User guide · VESTA-032

Vesta Røyk- og CO-detektor

Coverage: Step by step – removal partly inferred

Product image VESTA-032
Product VESTA-032 · Supplier product page

Battery/power: 3 × EL123AP lithium, as specified by the manufacturer

Before you start: check the full model name. Agreement test/service with the alarm provider before opening. Keep fastening and placement. On real smoke or fire: manage the danger first.

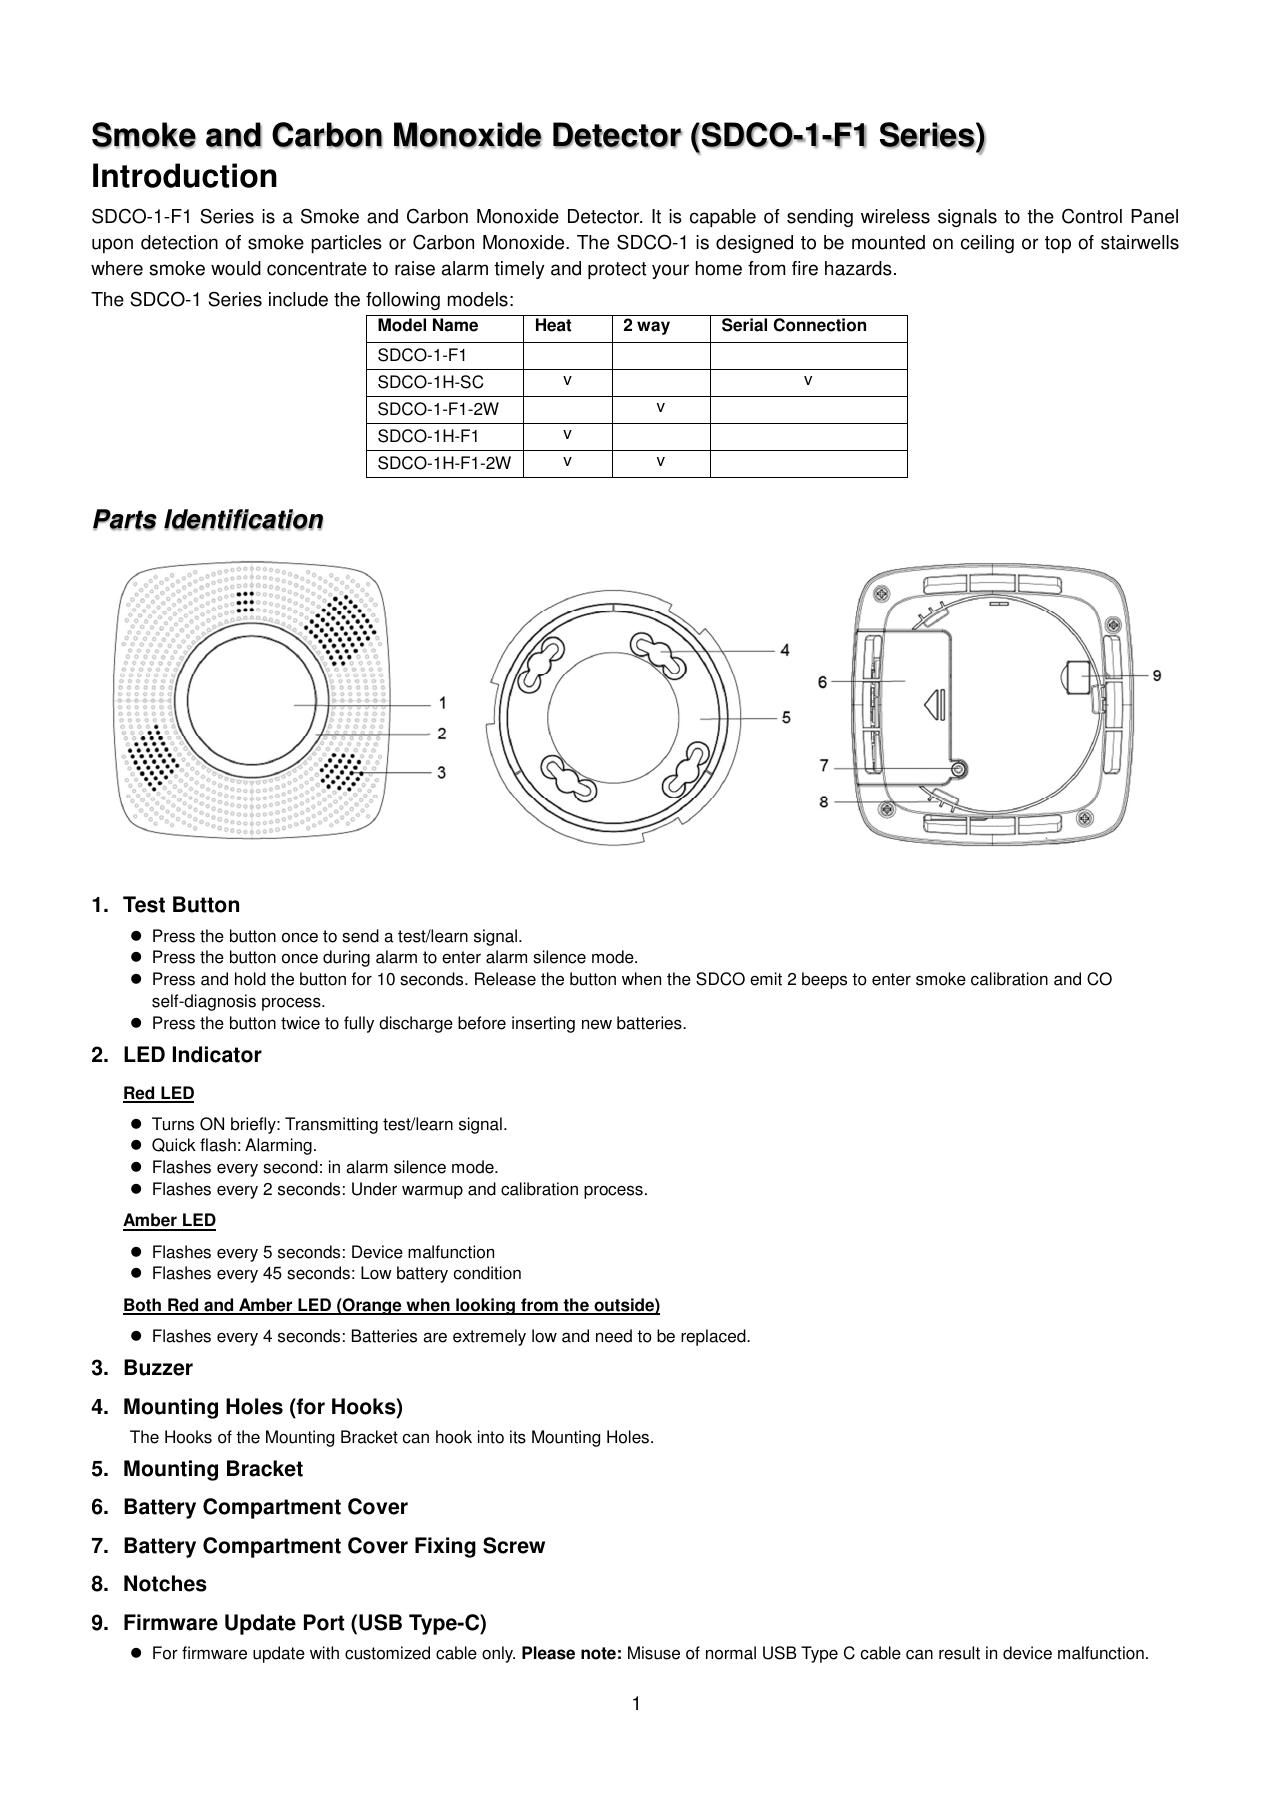
This drawing and PDF apply to the SDCO-1 series with round bracket. Compare the back of your detector before opening. The USB-C port (9) is only for the manufacturer's special cable when updating; it is not a charging port.

See the parts before you start
Originalmanual VESTA-032, side 1
Original manual, page 1 · Parts: 1 test button, 5 fastener bracket, 6 battery cover, 7 cover screws and 8 alignment marks. · Click for full size in PDF.
Originalmanual VESTA-032, side 4
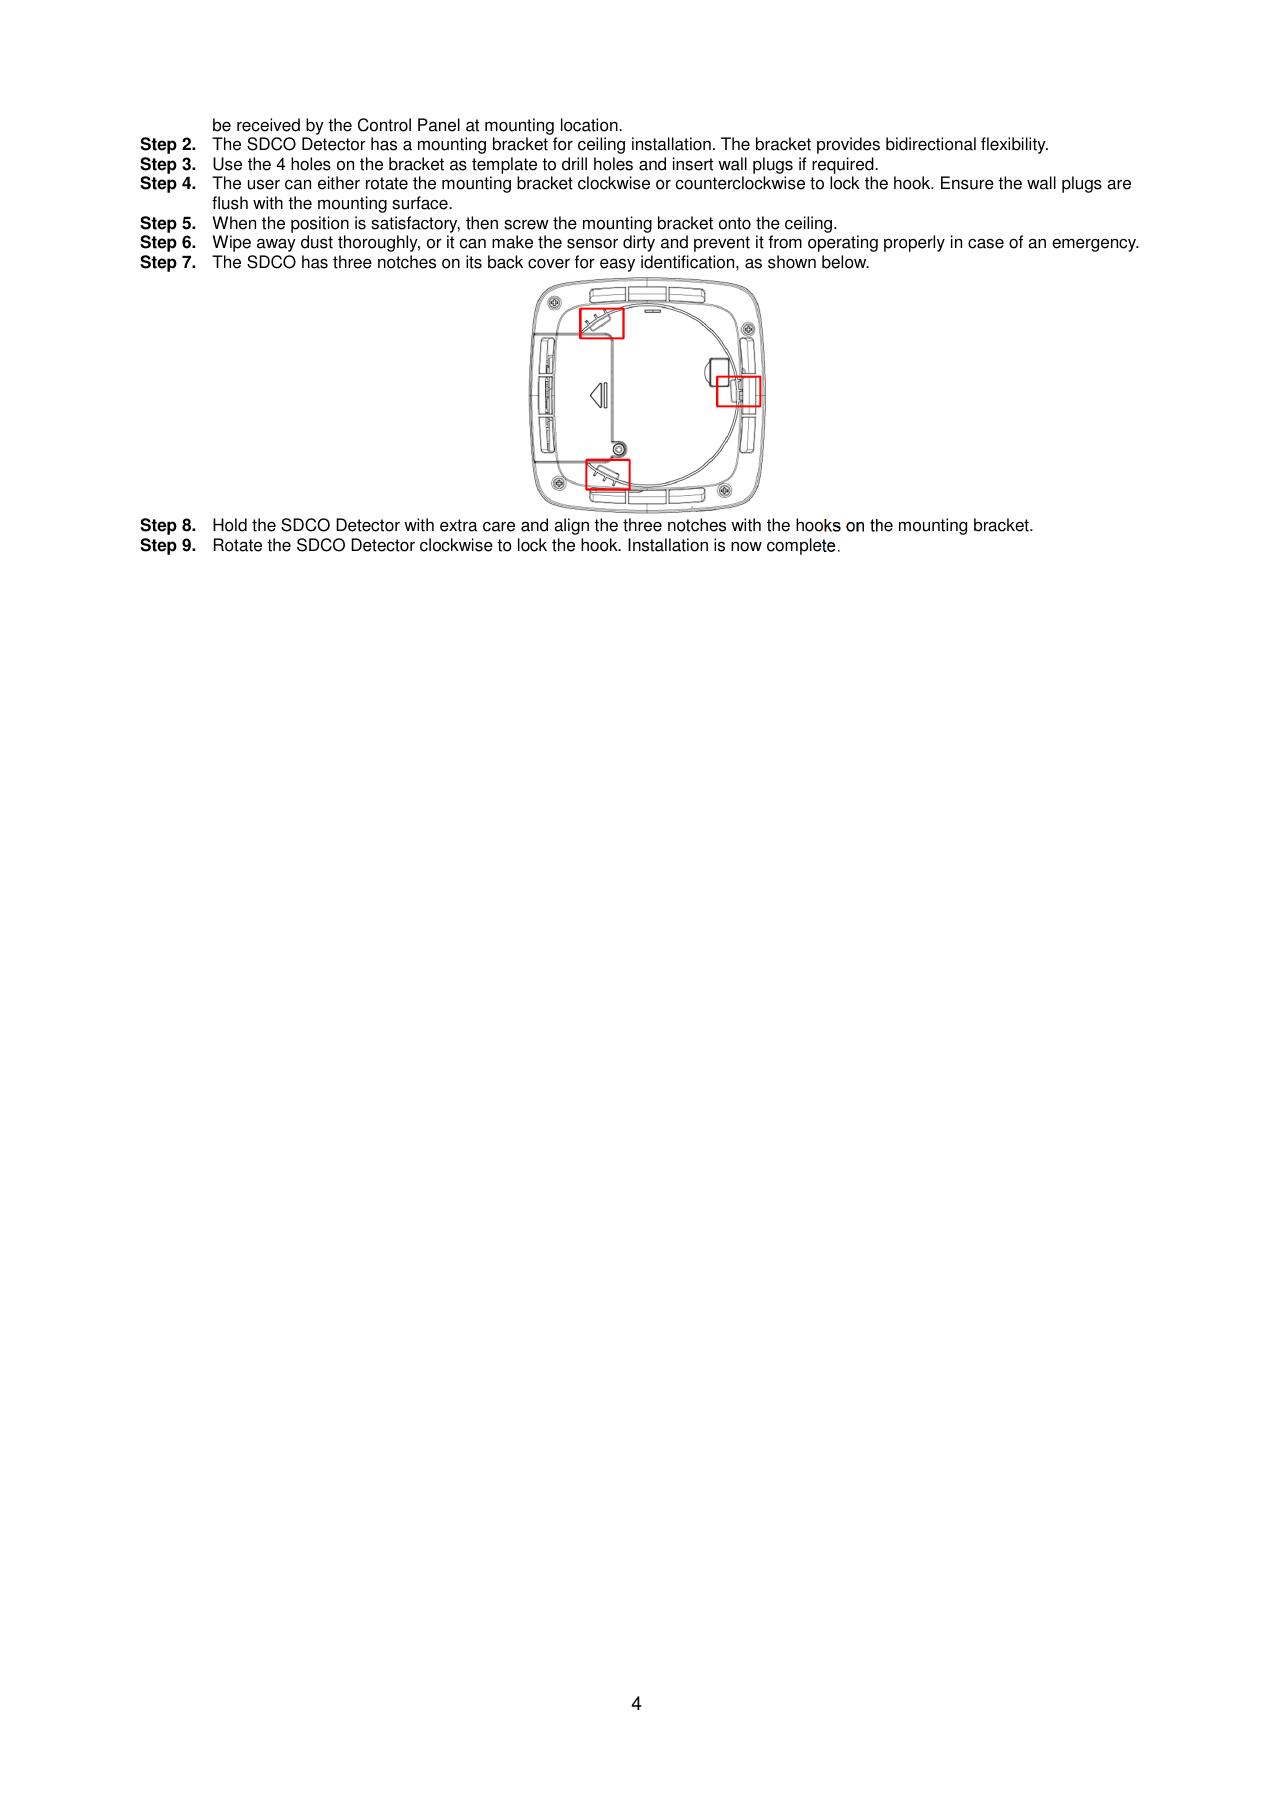
Original manual, page 4 · Set the detector back: direct the three marks against the hooks and twist with the clock. · Click for full size in PDF.

1. Take down or open

  1. Support the detector. It locks clockwise; normal release is in the opposite direction. This is inferred from the mounting description, not a separate removal instruction. Stop if it is locked or stuck.
  2. Locate battery cover (6) and screw (7) in the original drawing. Loosen the screw with a Phillips screwdriver and remove the cover.

2. Bytt batteri / lad

  1. Remove all three old batteries.
  2. Press the front test button (1 in the drawing) twice while the batteries are out. This discharges residual power before fitting new batteries.
  3. Insert three new EL123AP lithium batteries. Follow the positive and negative markings in the holder. Do not mix old and new batteries.

3. Put together and in place

  1. Secure the battery lid. Align the three marks with the bracket hooks and turn clockwise.
  2. Allow one minute for warm-up and 1–7 minutes for calibration. Wait for the confirmation sound and for flashing to stop.

4. Test and confirm normal operation

  1. Arrange a test. Press Test; the normal response is one red flash and a two-tone sound. Contact support for an abnormal response or continuous beeping.

Attach and Mount

  1. Leave the bracket in place during battery replacement. Do not move the smoke/CO detector to another room without assessing placement.

Check that the drawing and any variations in the original manual are consistent with the device. Sources checked 08.09.2026. The step marked as derived is not an explicit disunity instruction from the manufacturer.

Date: ________; · Battery type/number: ____________________________________________________________
Datasheets, photos and movies from Climax

Fra produsenten Climax

SDCO-1 Series · Vesta-modell: SDCO-F1

The manufacturer's side covers this model family. Check the protocols, frequency, power supply and variant in the Vesta manual before using technical values or mounting advice.

Description, specifications and images at Climax

Datasheets and product brochures

Climax Product Images (4)

The pictures show the manufacturer’s model family. Compare to your Vesta variant.

Vesta/By Demes: modellgrunnlag · Kontrollert 08.09.2026

Help when the product does not work

Wireless sensor: Read battery and connection state in the system. For low battery, use the model battery guide and check the battery type and whether it is replaceable. Note new metal objects or other changes near the sensor.

Choose the symptom and check the model scope before following the steps. This is troubleshooting, not a list of confirmed product defects.

General advice — model-specific fault procedure missing.

Smoke/fire detector: chirps, fault warning or unwanted alarm

Applies to: General advice for the sensor type — not a verified procedure for this model. Use the model manual for opening, battery type, testing and settings.

  1. For smoke, a burning smell or possible CO, address danger first. Do not treat an active alarm as a battery warning.
  2. Record lights, sound pattern and the exact message. Use the model manual to distinguish alarm, battery, end-of-life and technical faults.
  3. Look for dust, insects, steam or recent work nearby. Clean only as allowed by the model manual; do not open the smoke chamber or use spray as a test.
  4. Arrange and perform the model test after maintenance. Sealed-battery and wired variants require different action from replaceable-battery detectors.

Check the result: The detector passes the manufacturer test and the current fault clears.

Stop and get help: If the test fails or the detector is removed from use, contact support and arrange replacement coverage promptly. Do not cover the detector.

Background source / example model (not model verification): support.ajax.systems — open documentation

Find help for another product Contact support

Sources reviewed 9 September 2026. Not tested on your installation.