Yale Doorman L3 / L3S
Original Yale cover. Select the image to enlarge.
English translation of the Norwegian library. Product names and original documents retain their source language. Model-specific maintenance steps have been reviewed; other text uses assisted translation. Check the original manual before work.

← Product search · All Yale Guides
A direct supplier item link has not been confirmed for this entry. A general supplier website is not an item link.
Troubleshooting – step by step
Original Yale cover. Select the image to enlarge.
For Yale Doorman L3. The original manual below covers both L3 and L3S; use the parts and illustrations for your variant.
The manual explains the control of page 33. Norwegian programming for standalone locks is on pages 43 – 45. The door should be open during programming. App setup is described separately; do not use the keyboard menu as if the lock was standalone when controlled by an integration.
L3: management, app and daily use – page 33Start with preparation on page 9. Follow further lock box, exterior sign, mounting plate, interior sign, twisters and activation in the order of the manual. End with function test and adjustment of the end piece before normal use.
Yale_Doorman_L3-L3S_Installations Guide.pdf – installation from page 9The function test on page 28 controls locking, unlocking and mechanical emergency opening. Follow the illustrations and test with open door. In case of problems not resolved, contact Yale or the installer and provide L3, app/module and accurate error message.
L3: Functional tests and illustrations – page 28Yale’s current website and videos are marked L3S. Therefore, check the model before following any recent instructions.
Yale support – current page is marked L3SStart at top and check that the parts match your lock. This is a guide through the original manual; goals, racing and variant selection are in the drawings. Perform the function test before the lock is applied.
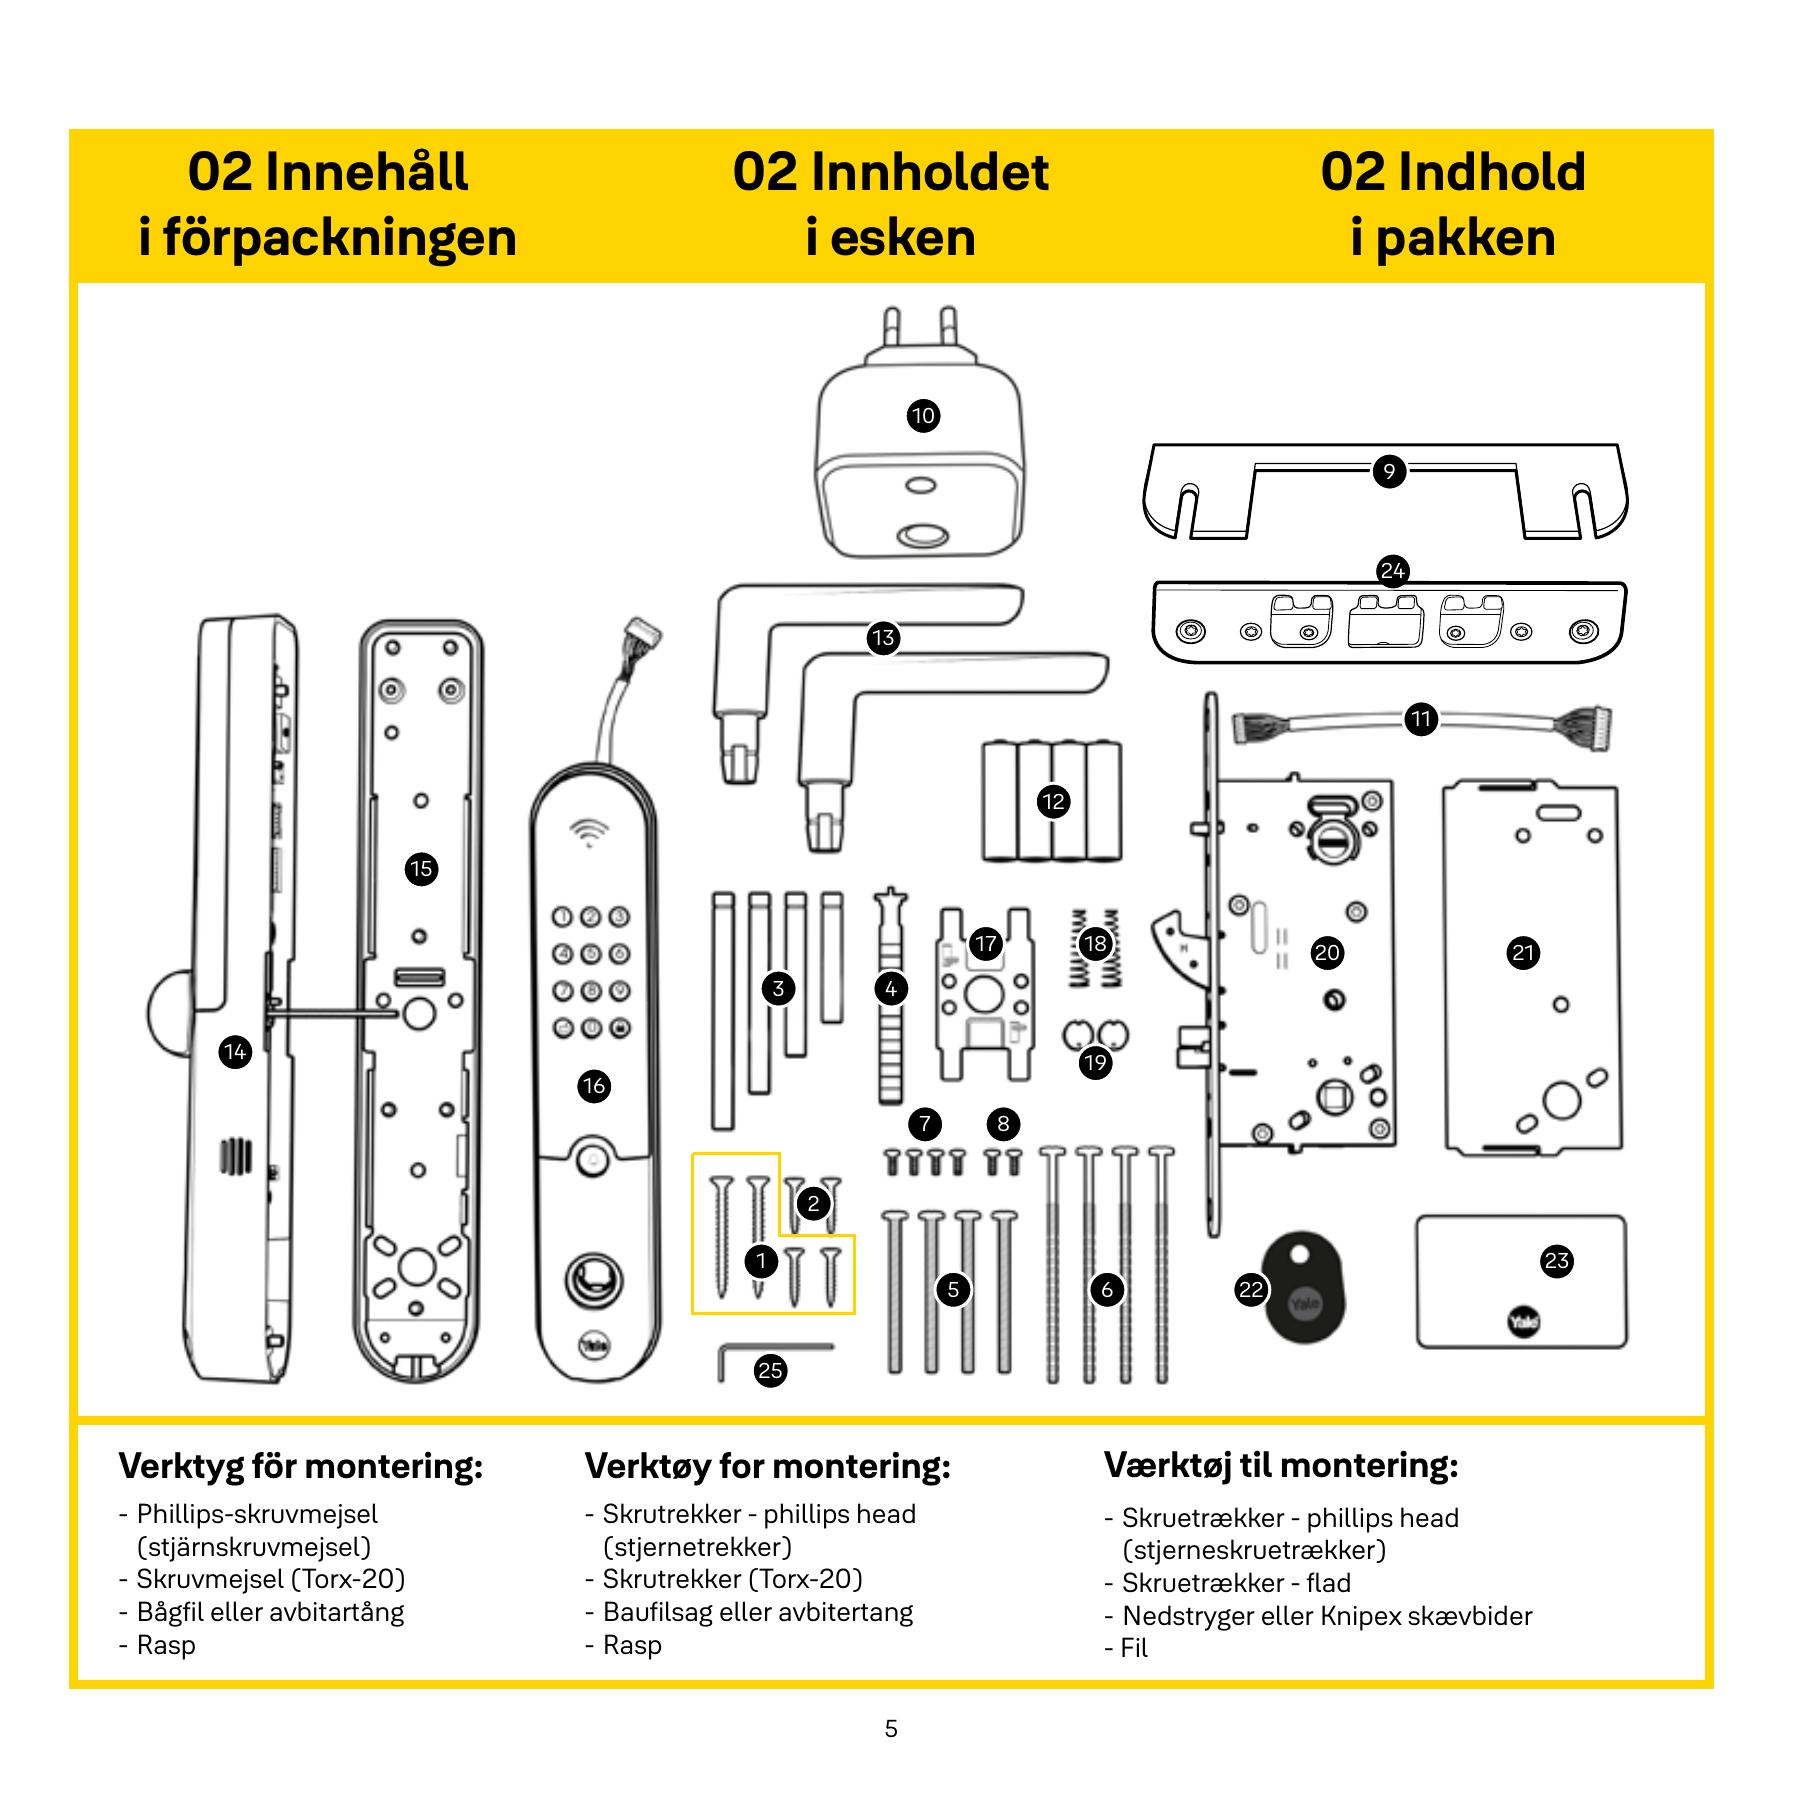
Use the section overview to recognize the lock box, signs, carryers, screws and tools.
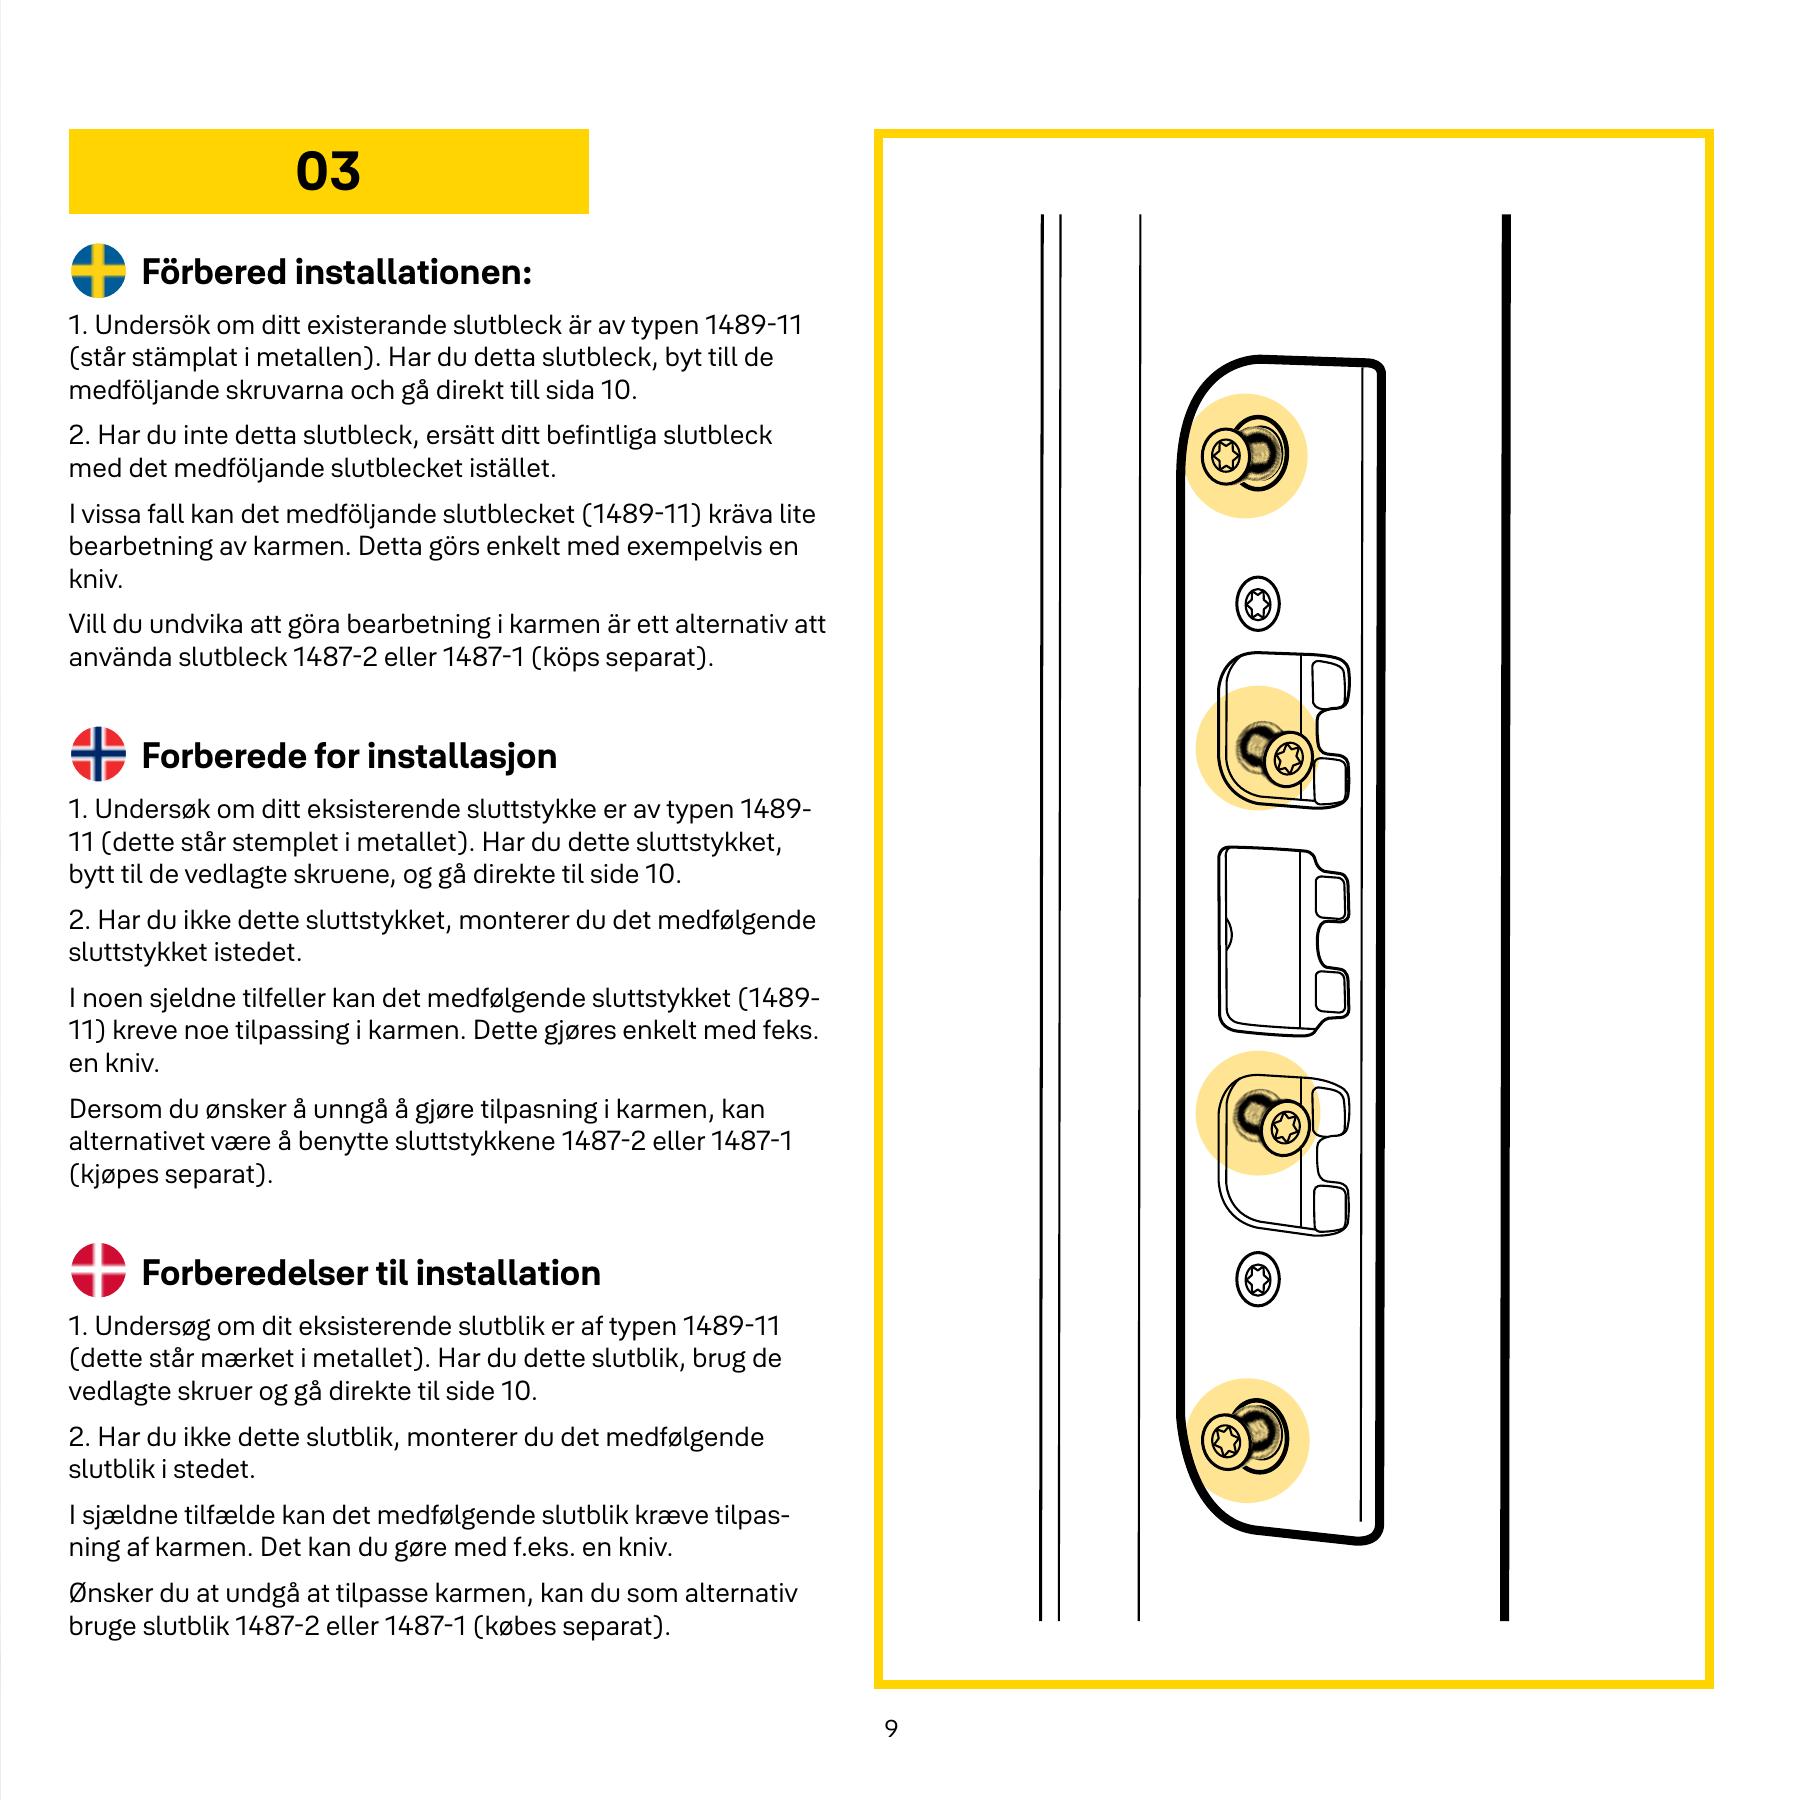
Check the conditions on the page before demounting and customization. Follow further steps in the PDF if your door requires changes.
Connect the cable to the lock box. Lead the cable through the hole on the inside while inserting the lock box. Cable protection should be shielded against sharp edges.
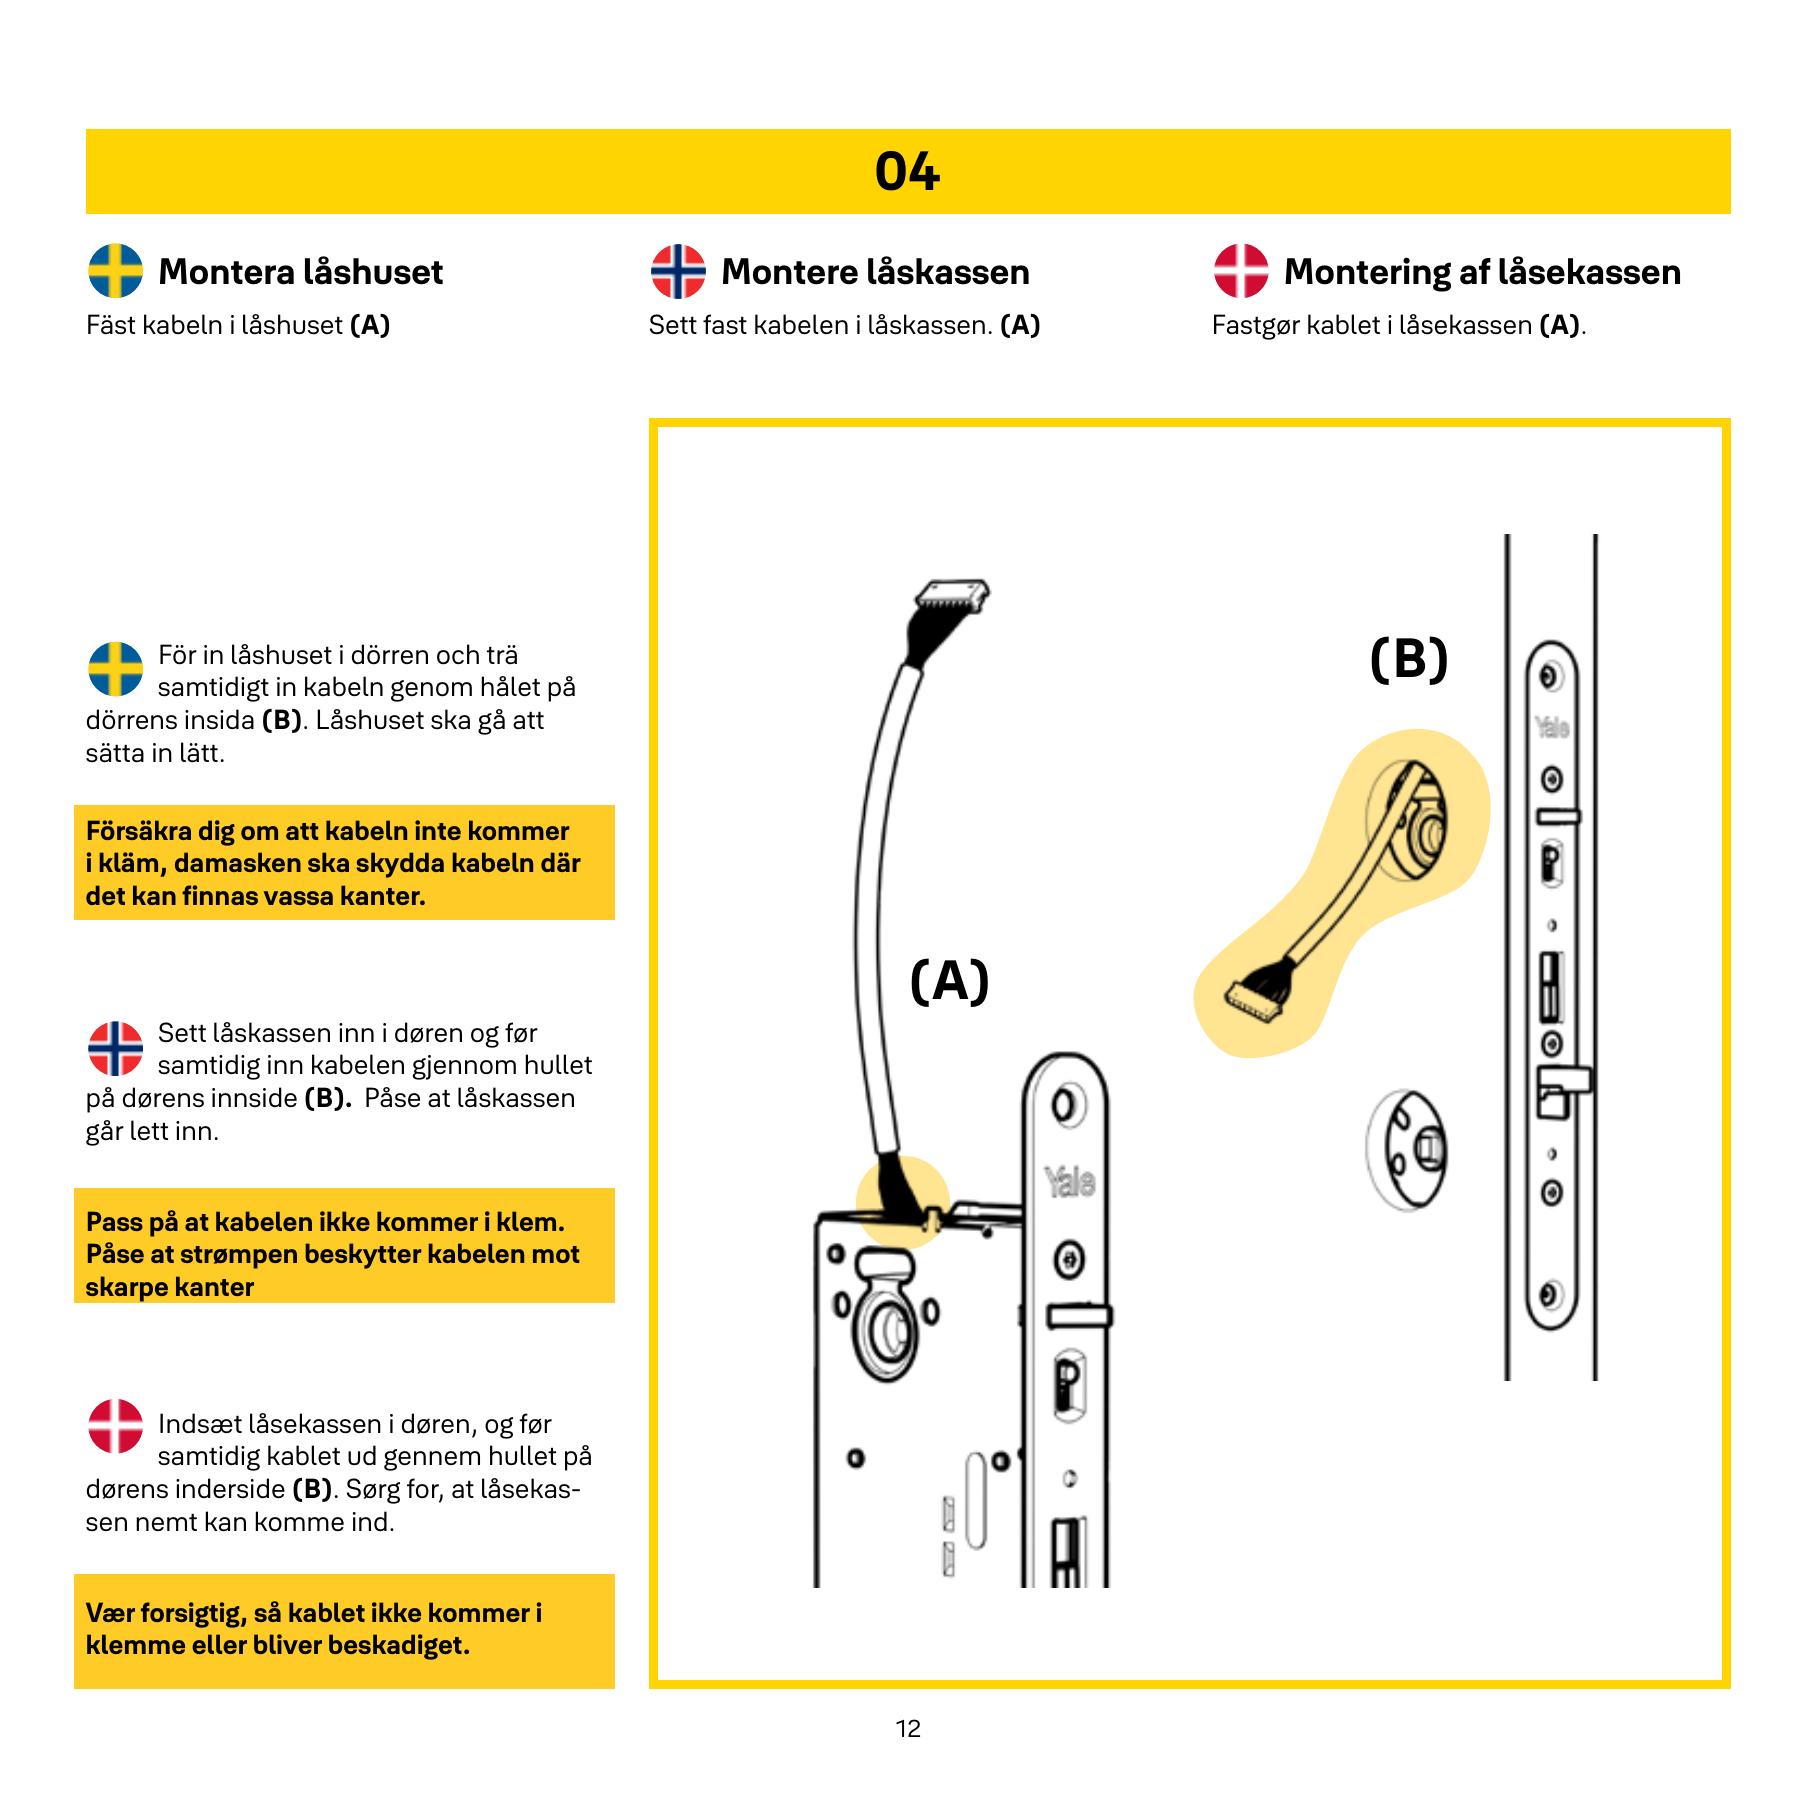
Before the parts through the door as the figure shows. Check direction and cable path.
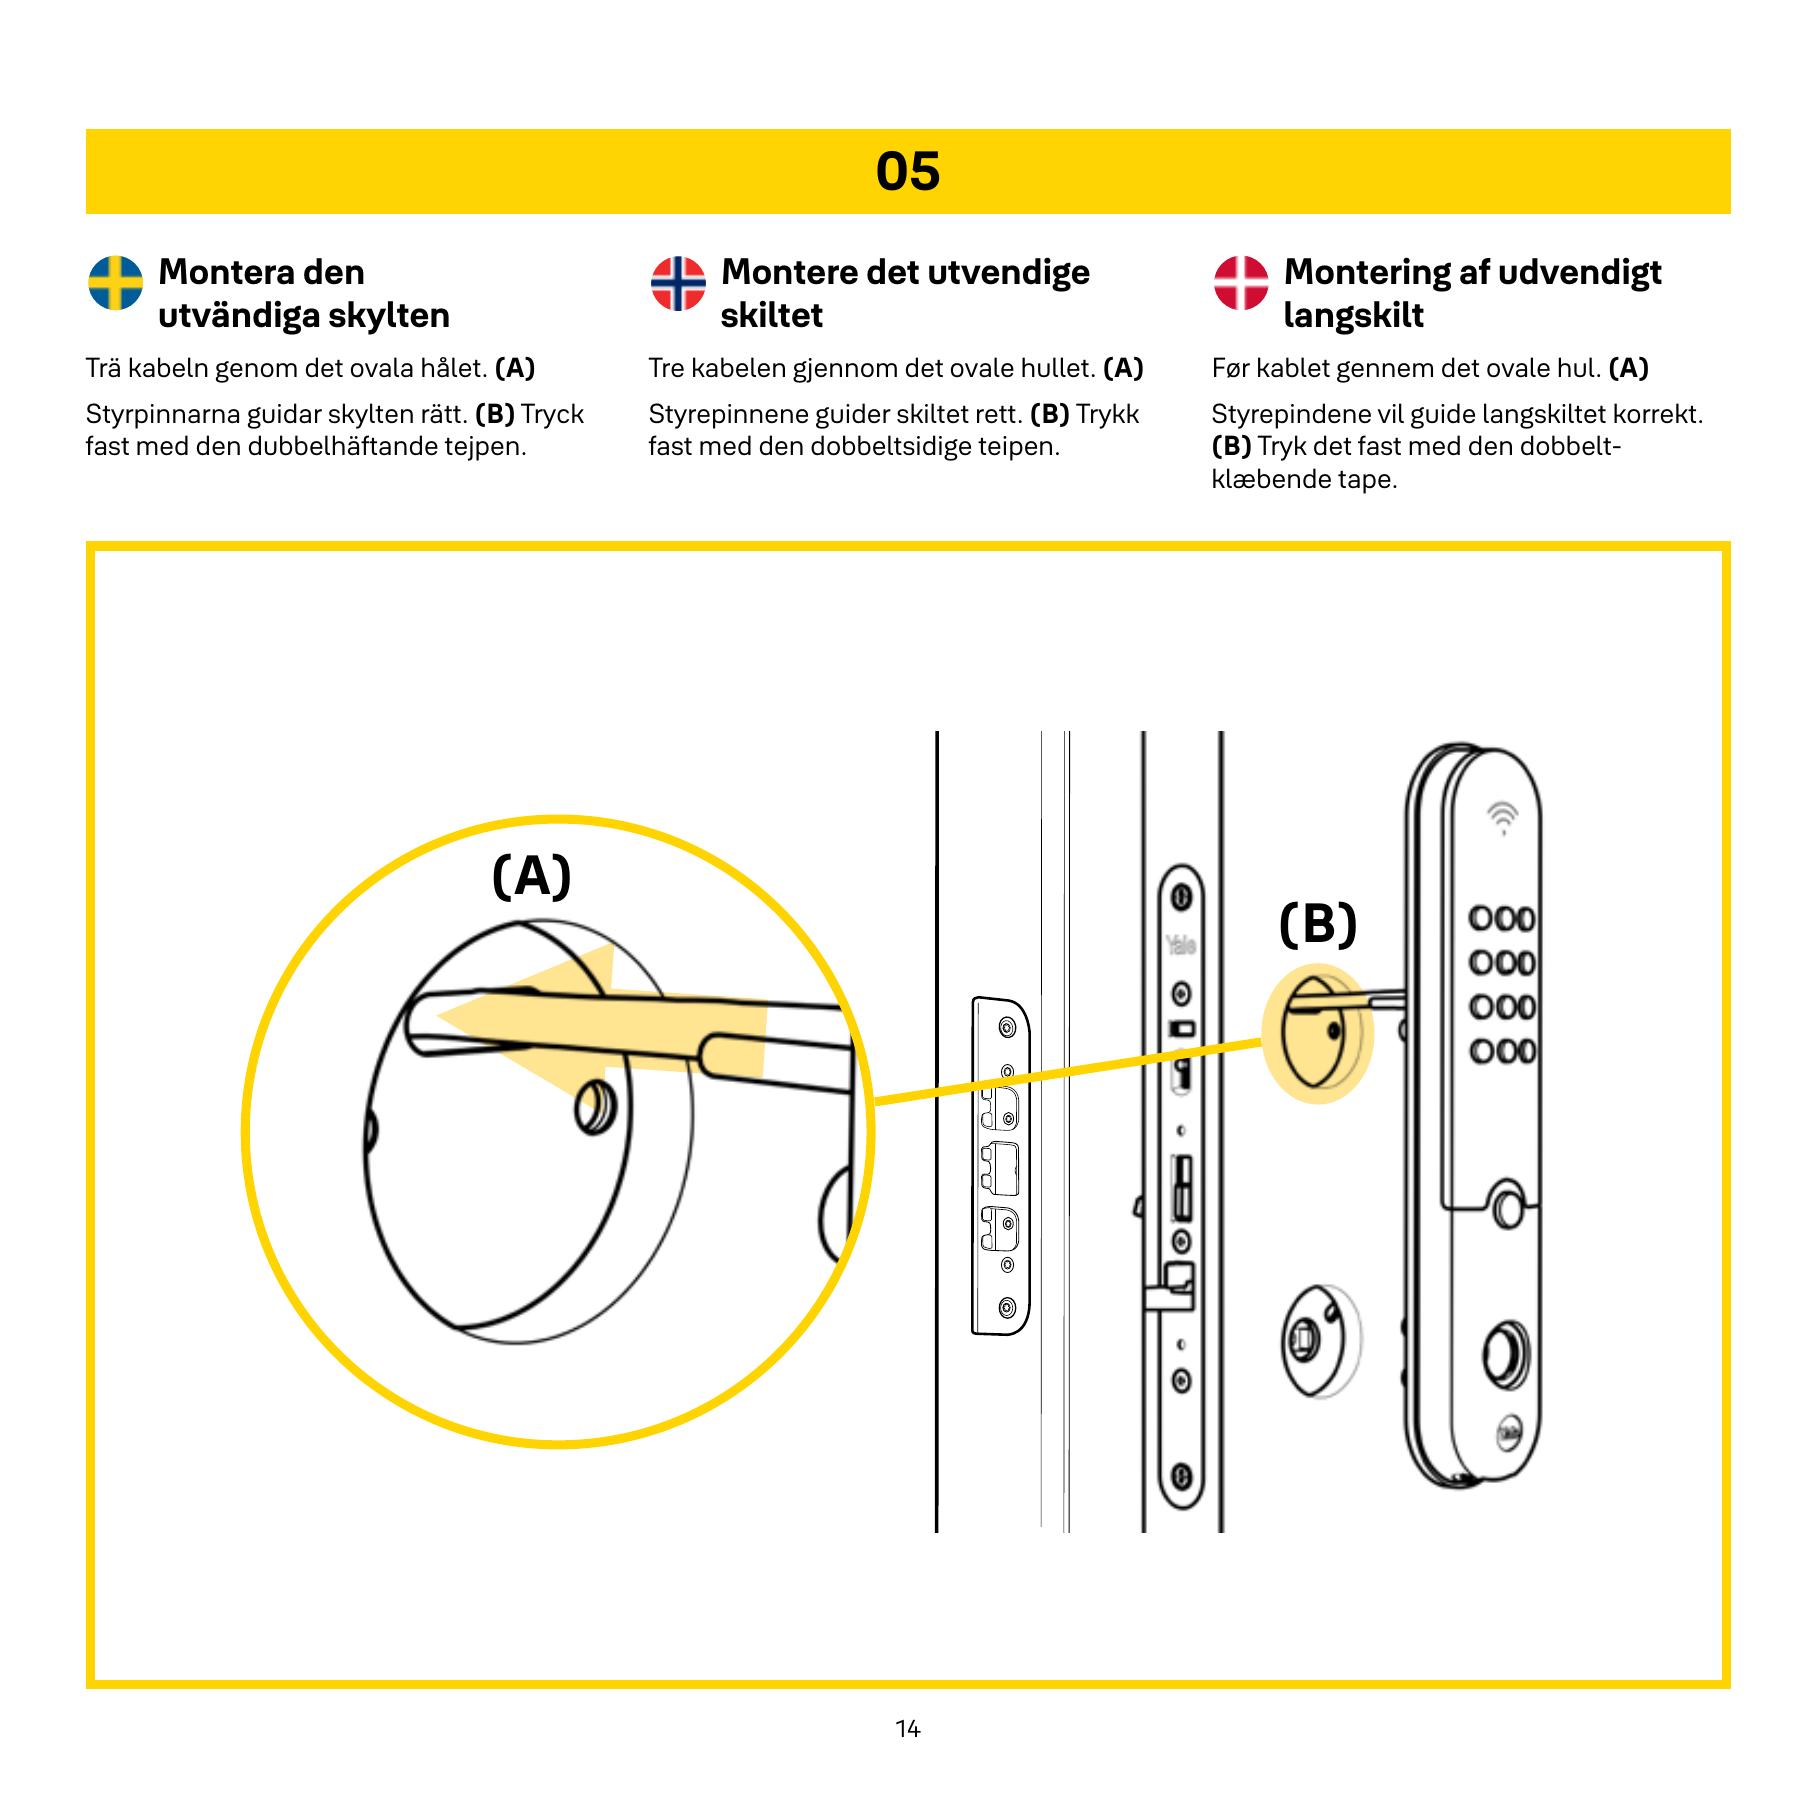
Use the screws and the customization specified in the original drawing. Check that the plate is located correctly.
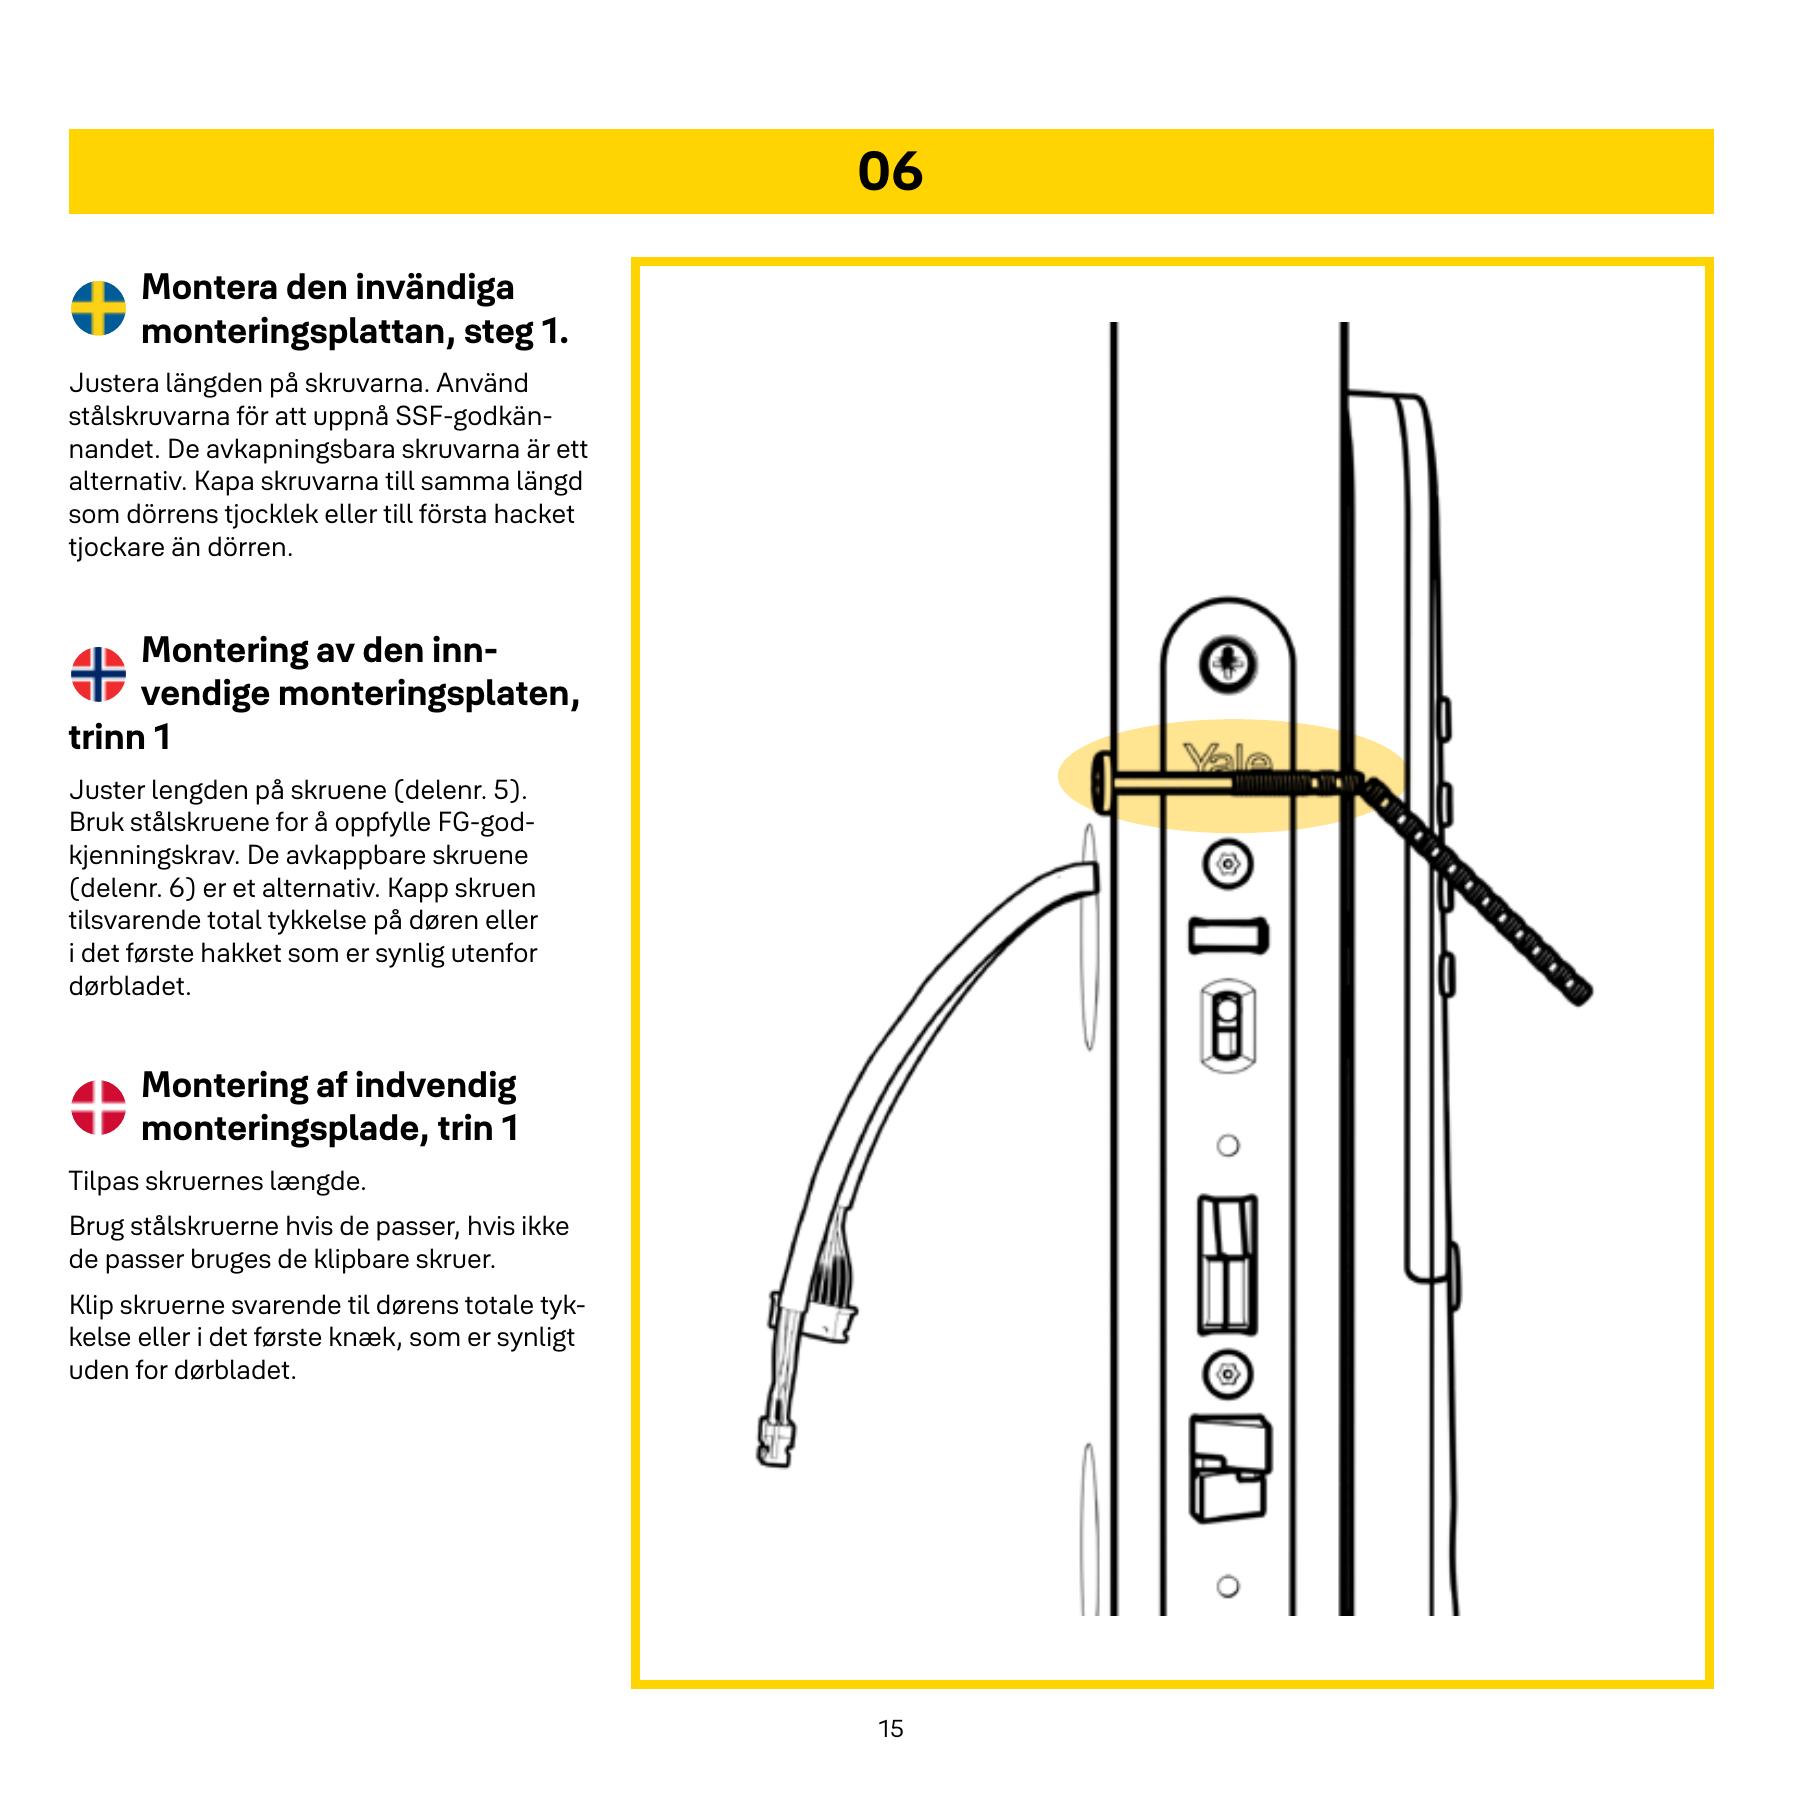
Check the carryer and cable before attaching the sign. Follow the figures for the correct variant.
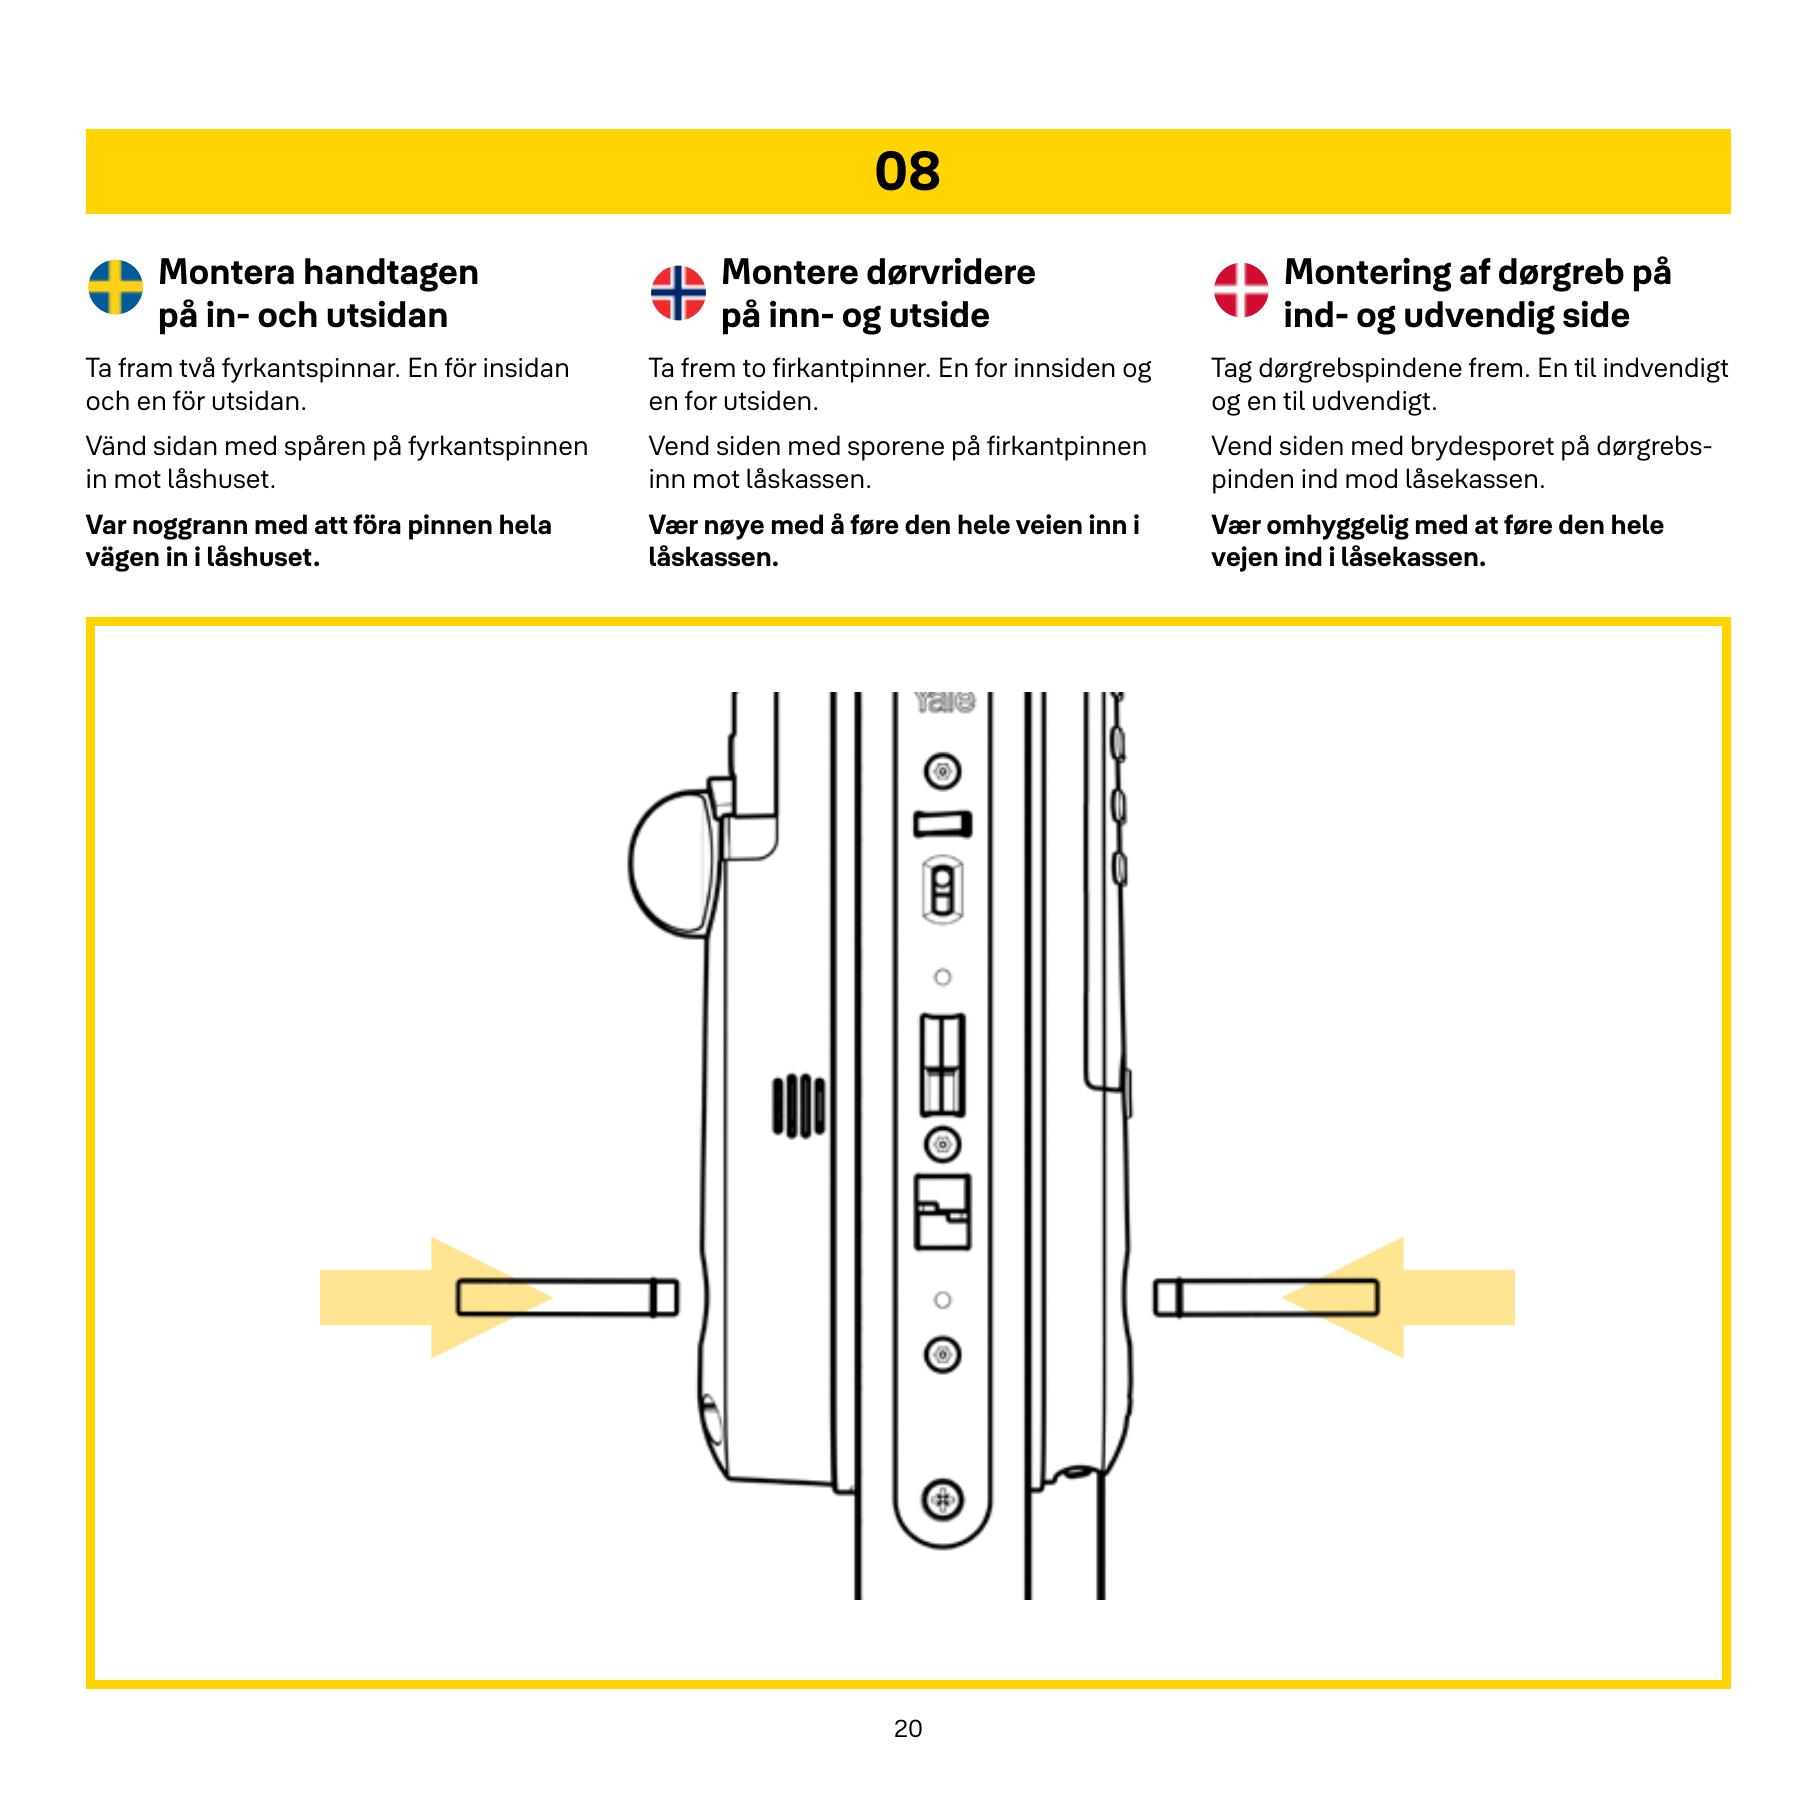
Follow the direction and fastening of the drawing. Check that the twisters move as indicated.
This applies to the first configuration, not normal battery switching. Keep the door open. Insert the batteries, present the initiation card when the lock requests it, and follow the speech messages for master code and verification. The app controlled configuration can differ.
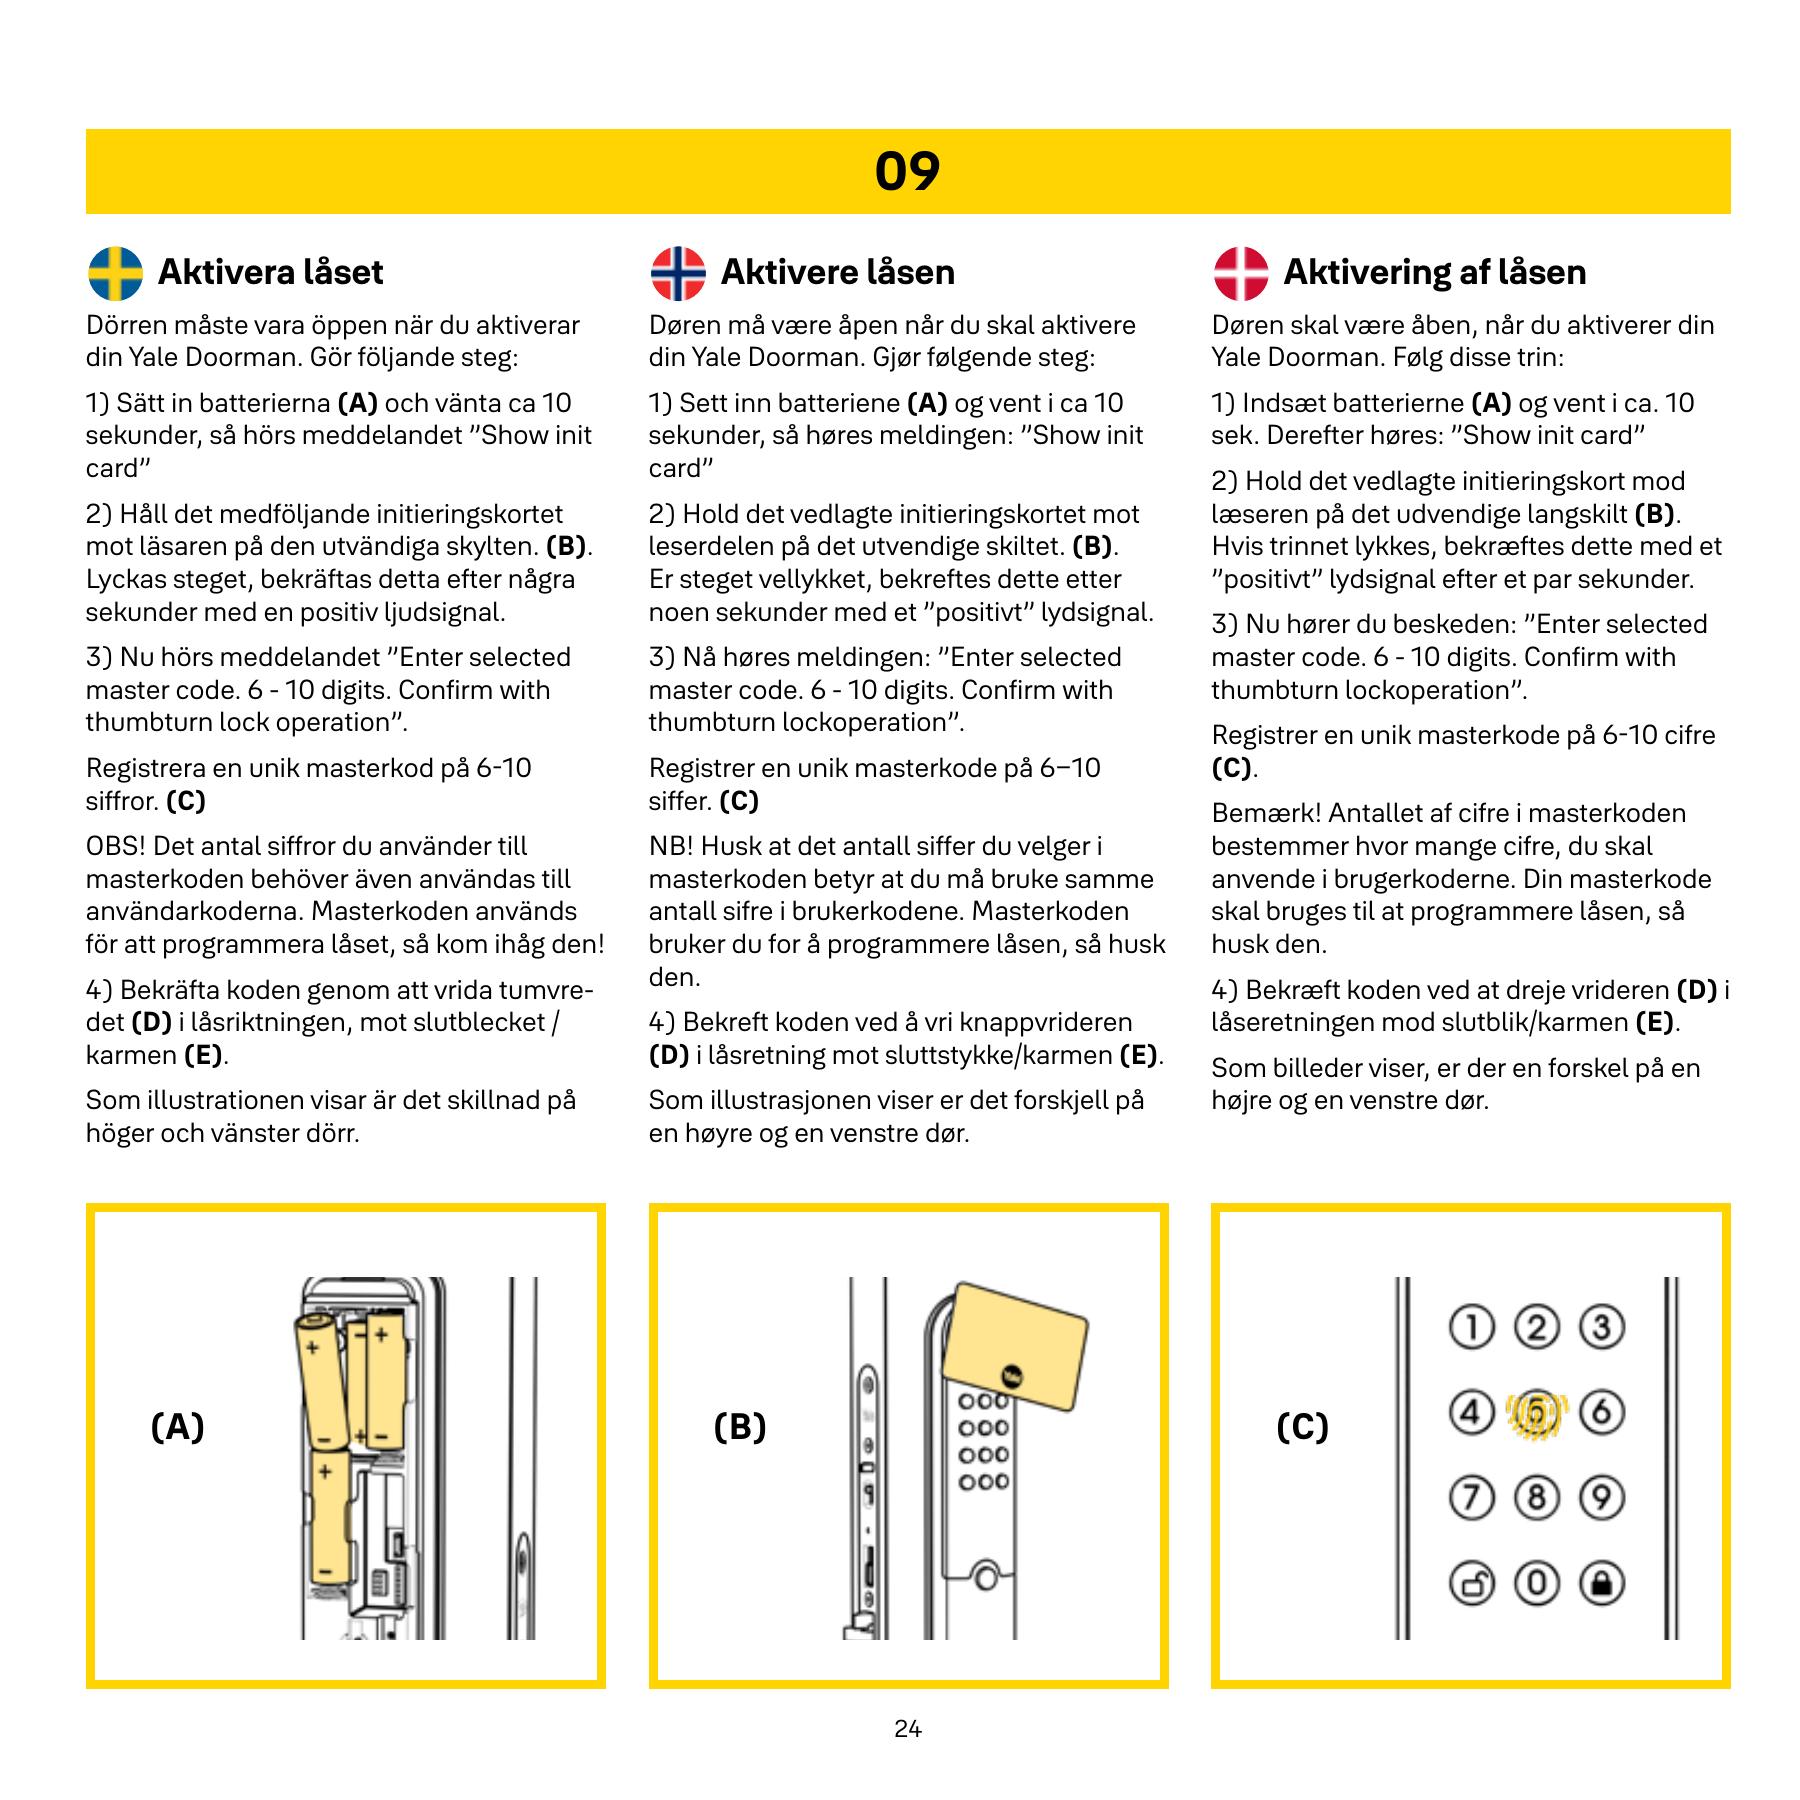
Continue the confirmation in the original manual before the function test.
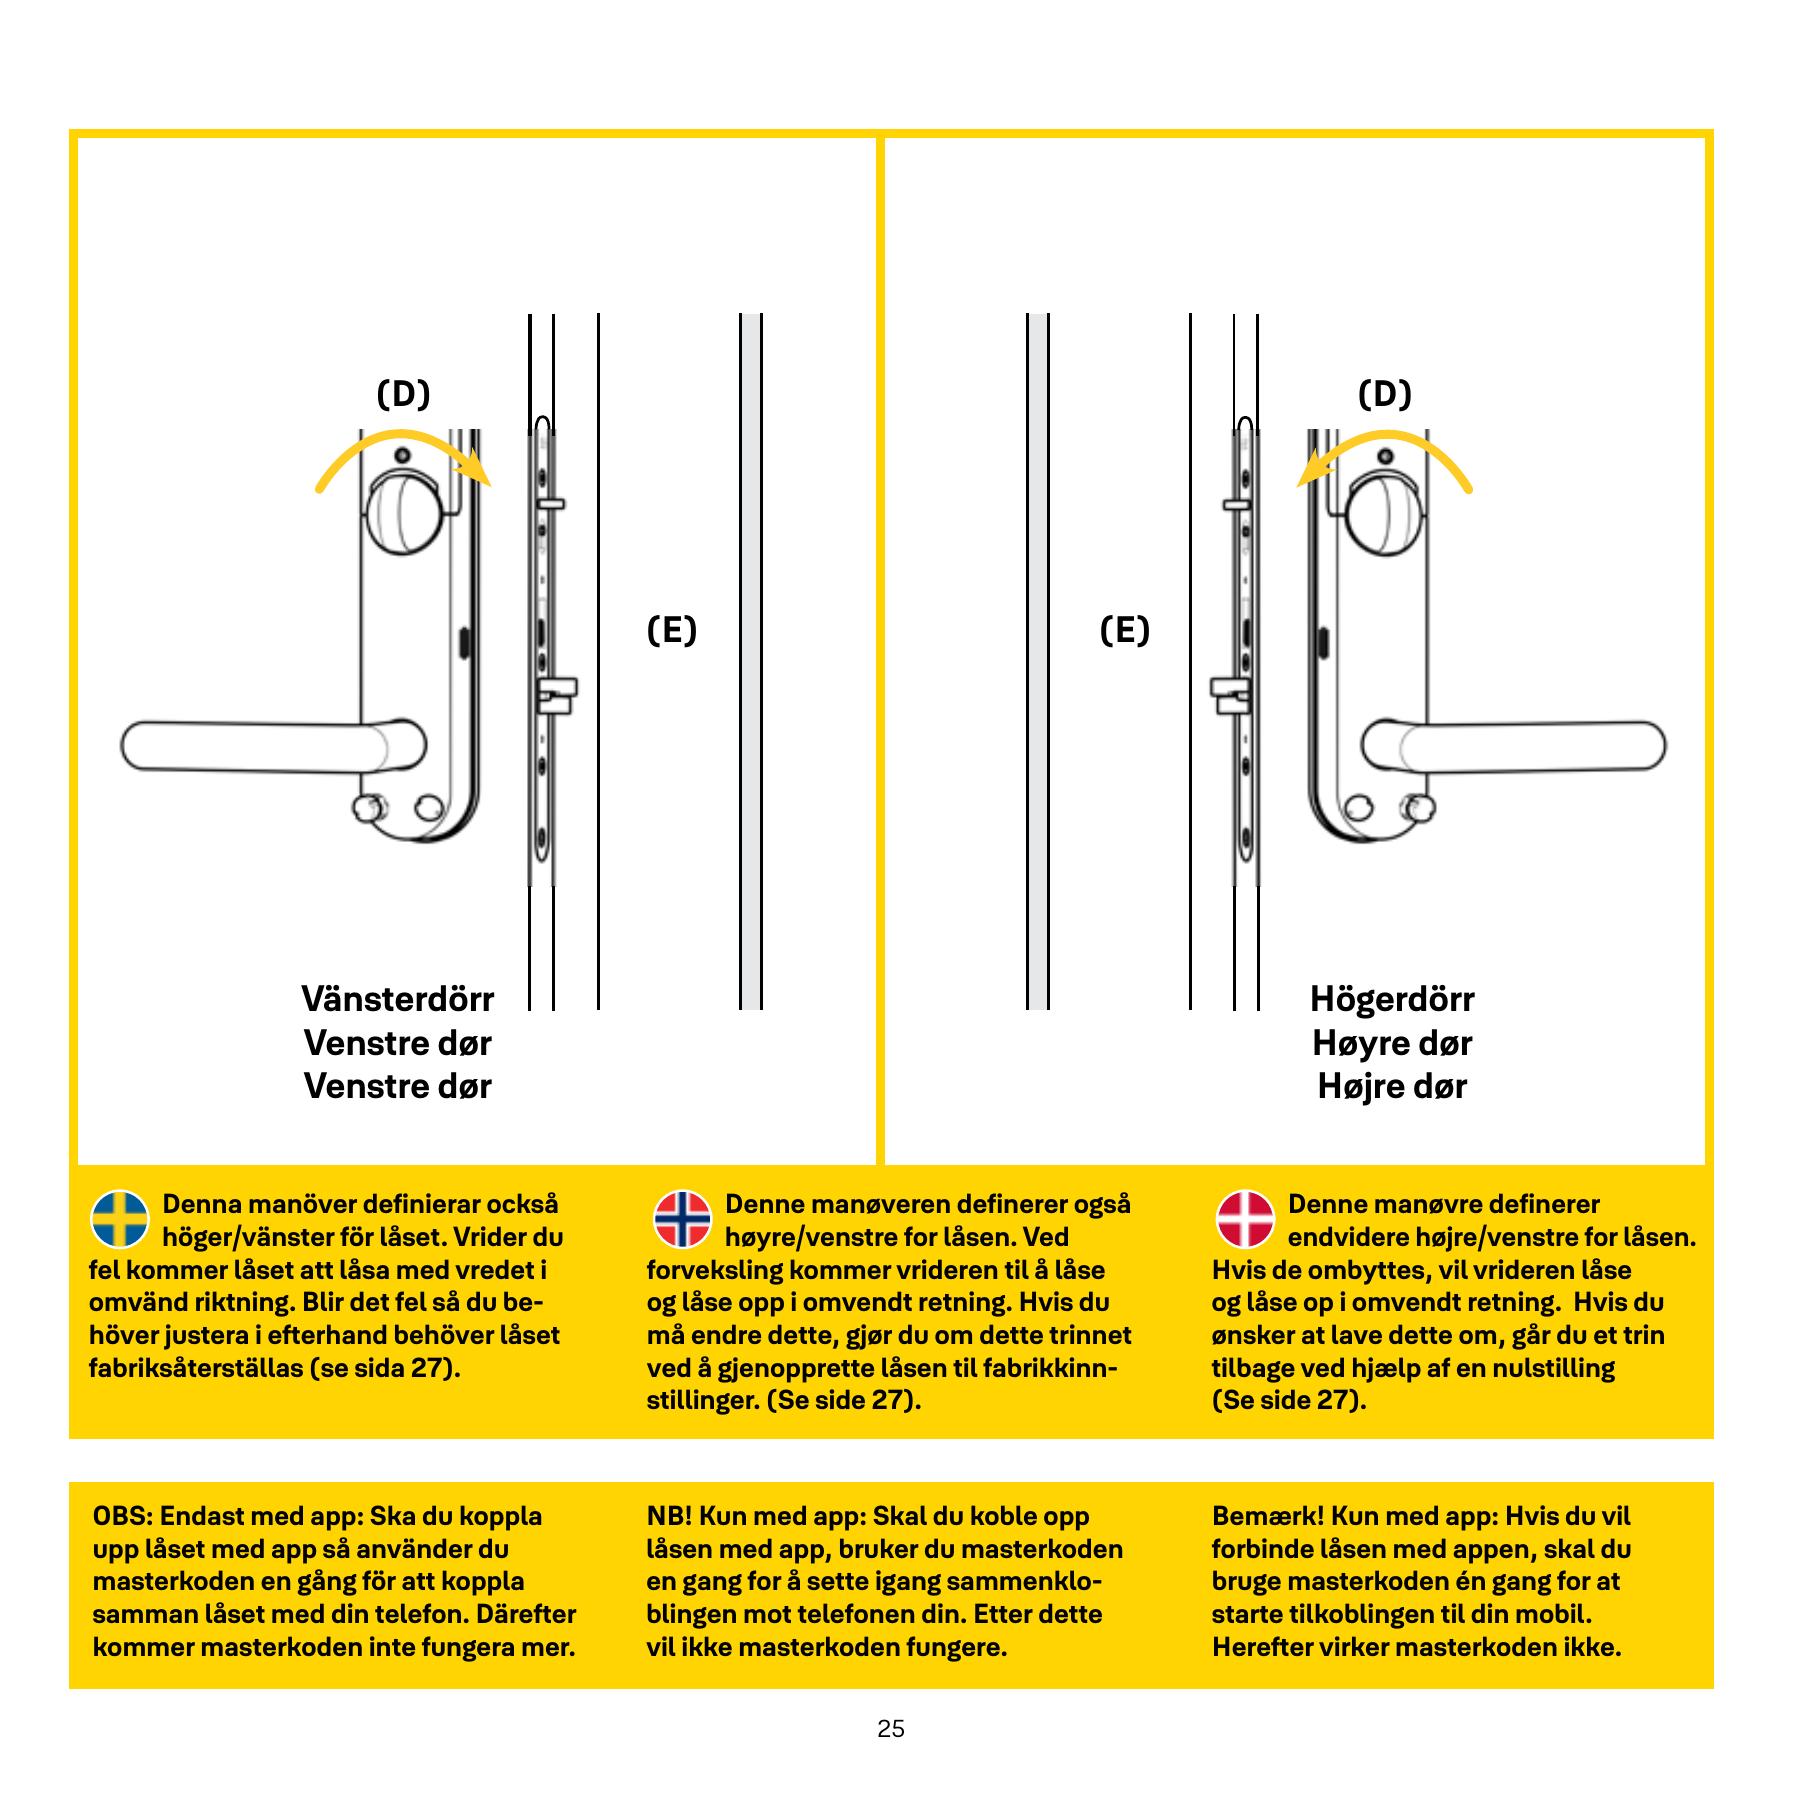
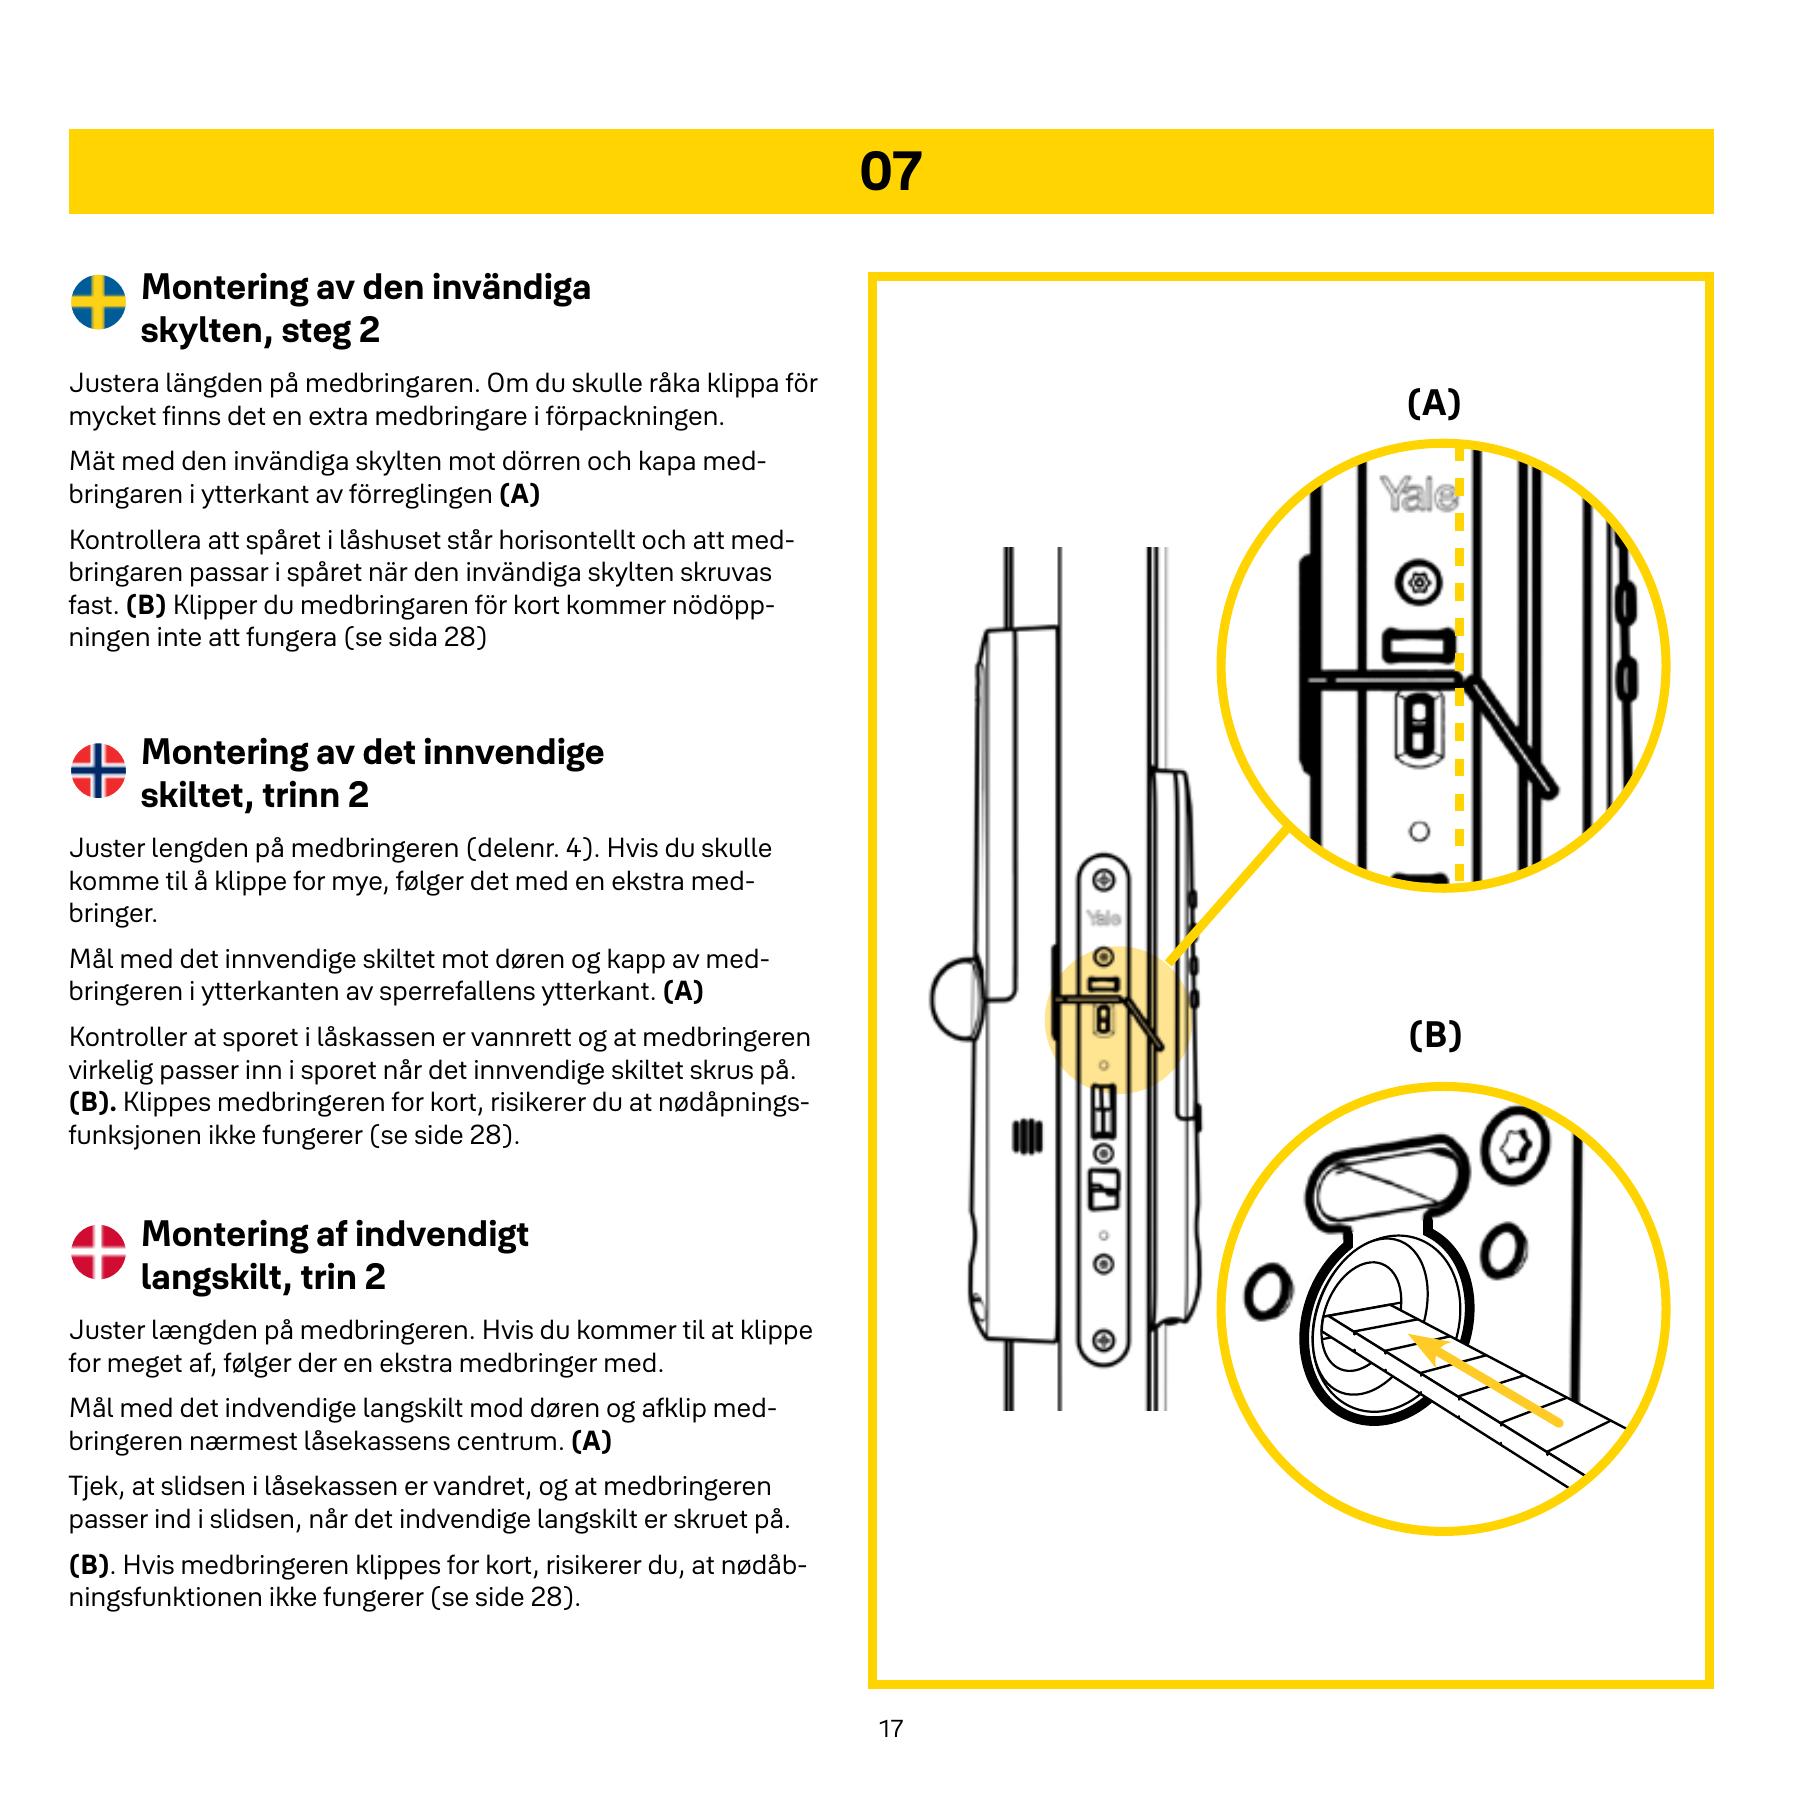
Use the letters of this drawing along with the PDF page 28 test. Do not use the lock if the test fails.
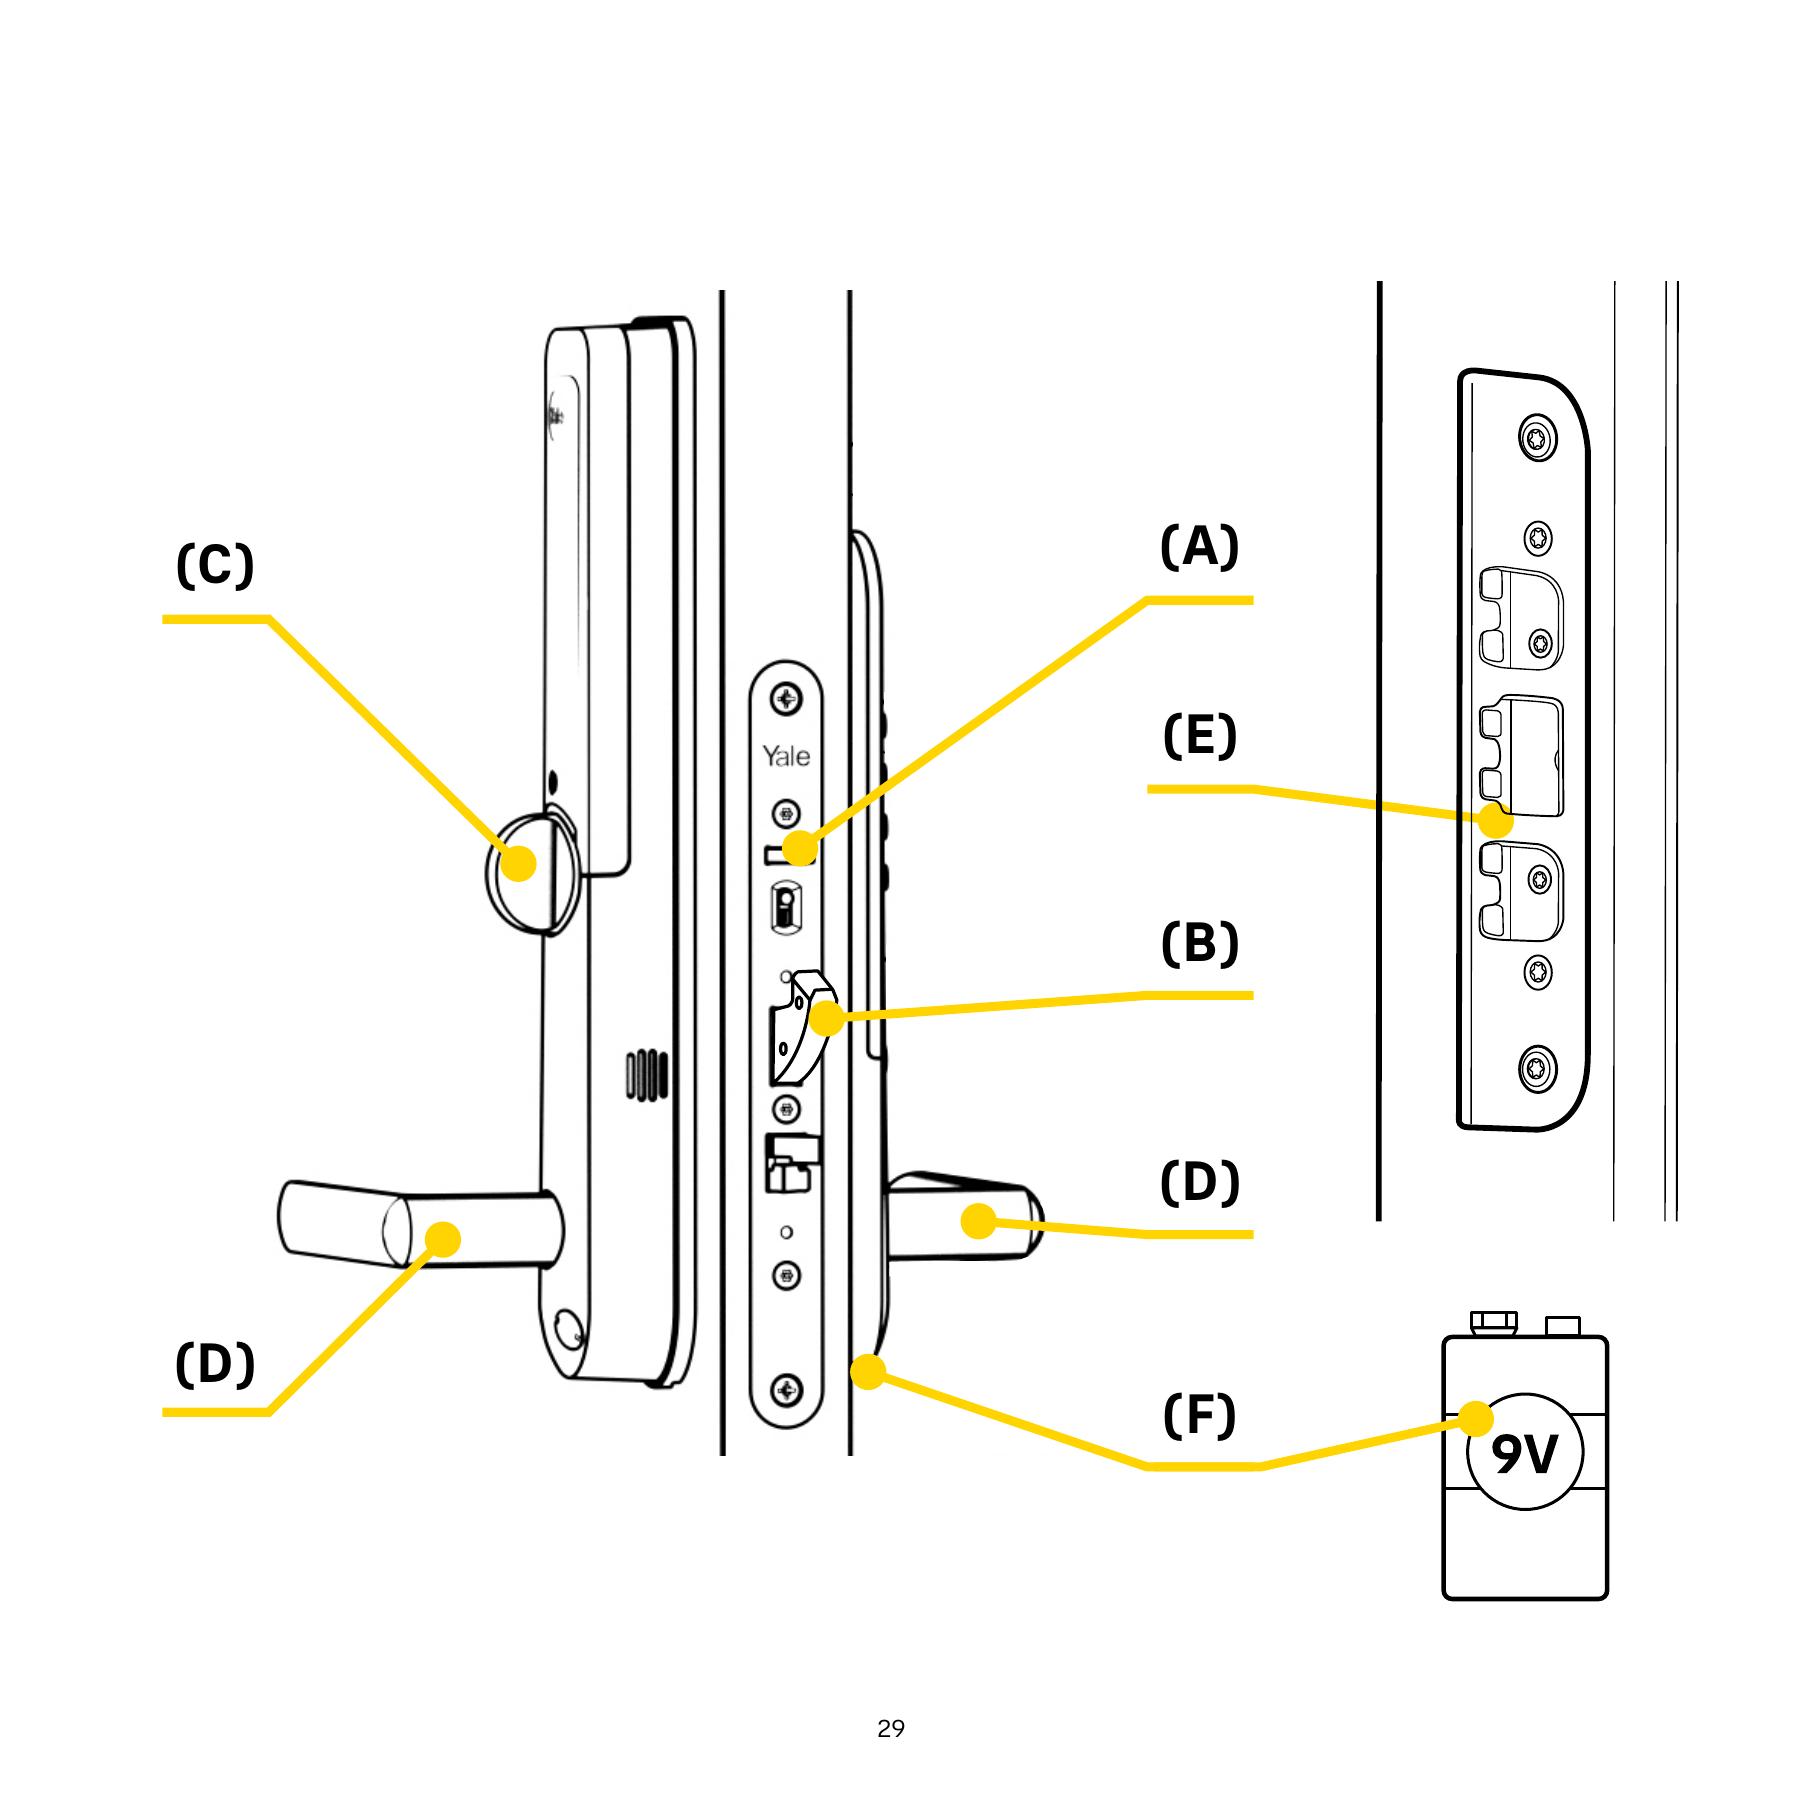
Choose the symptom and check the model scope before following the steps. This is troubleshooting, not a list of confirmed product defects.
Applies to: For a powered lock that will not complete locking. Keep the door open during the test.
Check the result: The lock can lock and unlock without pushing or lifting the door.
Stop and get help: If the open-door test fails, have the lock checked before further use. State which part of the test failed.
Open full guide with illustrations and sourcesSources: yalehome.co.uk — open documentation
Applies to: For Yale Doorman L3. You need a 9 V battery and a valid code or key tag.
Check the result: The lock responds to emergency power and opens with valid access.
Stop and get help: If there is still no response or a mechanical obstruction, contact service/a locksmith. Do not use force or a factory reset as emergency opening.
Open full guide with illustrations and sourcesSources: yalehome.co.uk — open documentation
Applies to: Identify the model before intervention. L3 and L3S must not be treated as interchangeable.
Check the result: You have selected the correct procedure for the model and symptom.
Stop and get help: A factory reset can erase settings and access. Do not use it as the first response to an unresponsive app or lock.
Open full guide with illustrations and sourcesSources: yalehome.co.uk — open documentation yalehome.se — open documentation